|
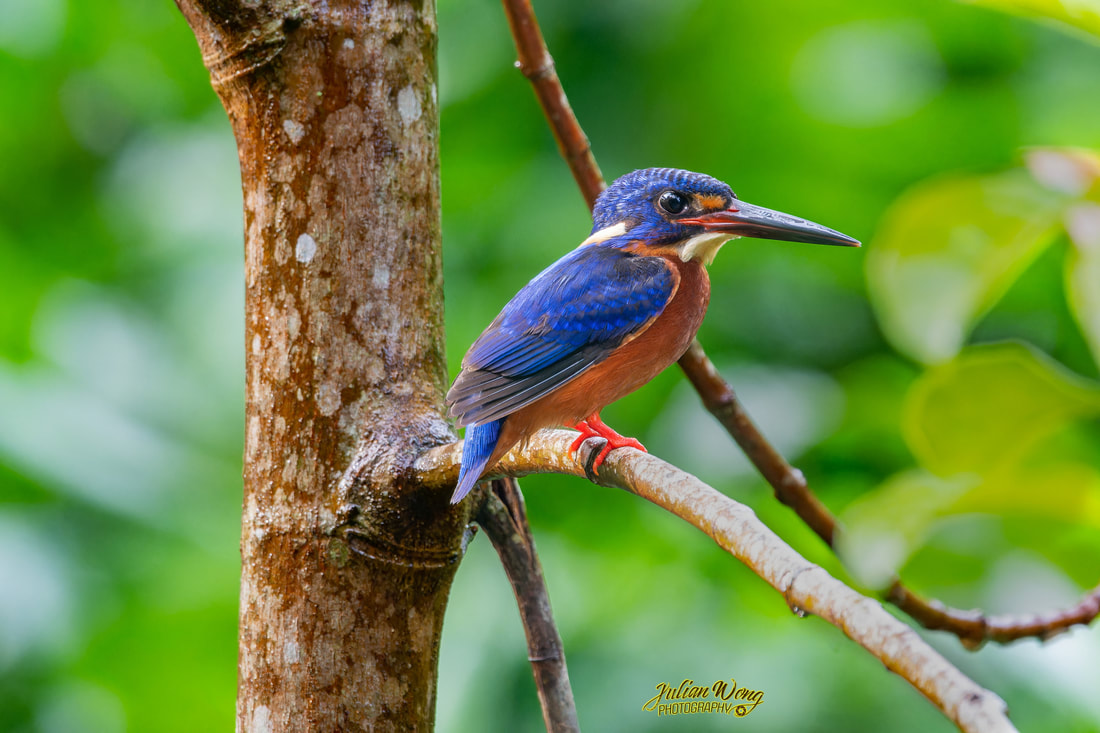
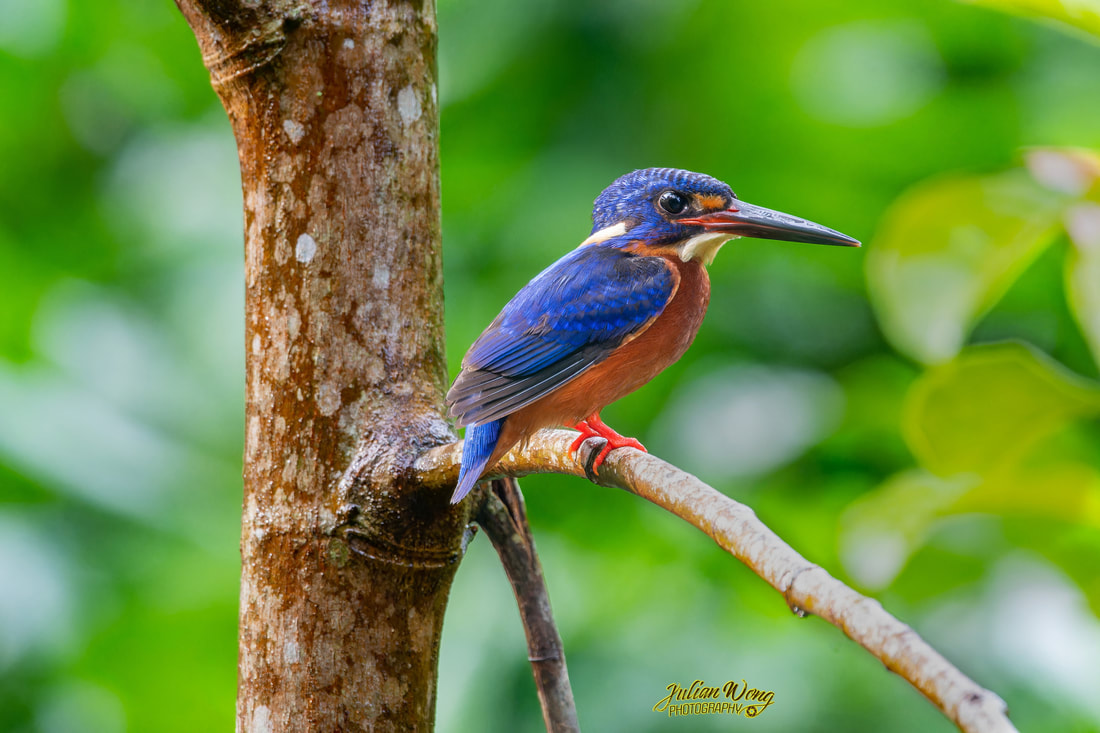
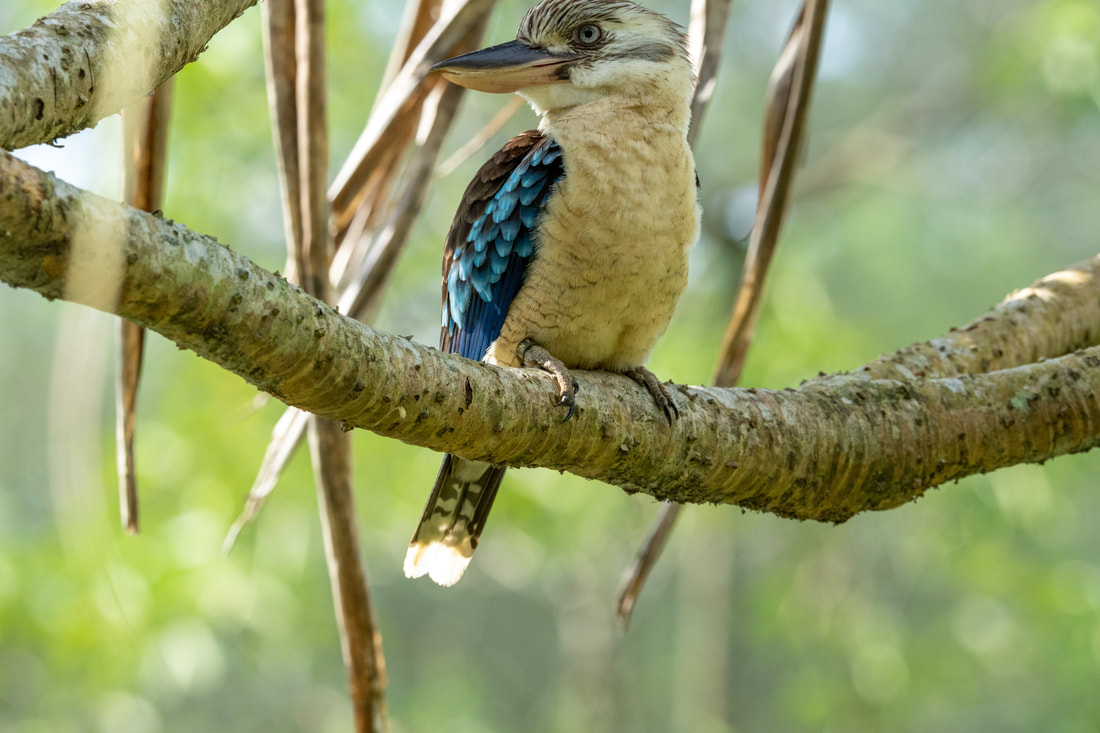
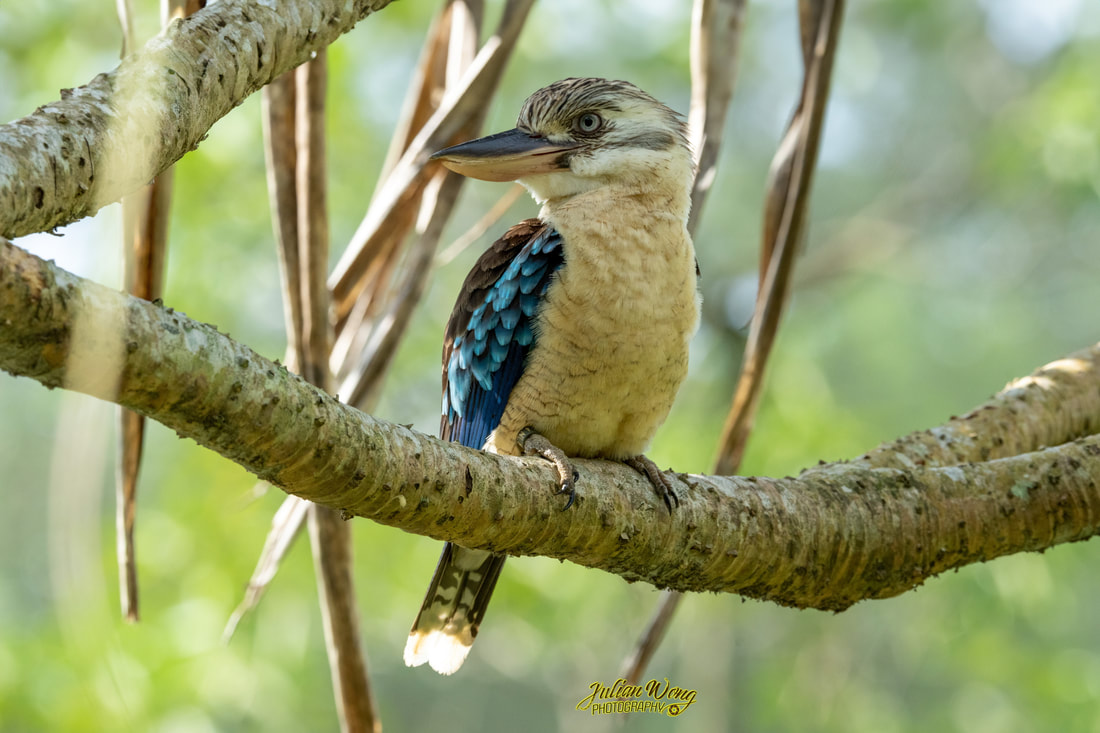
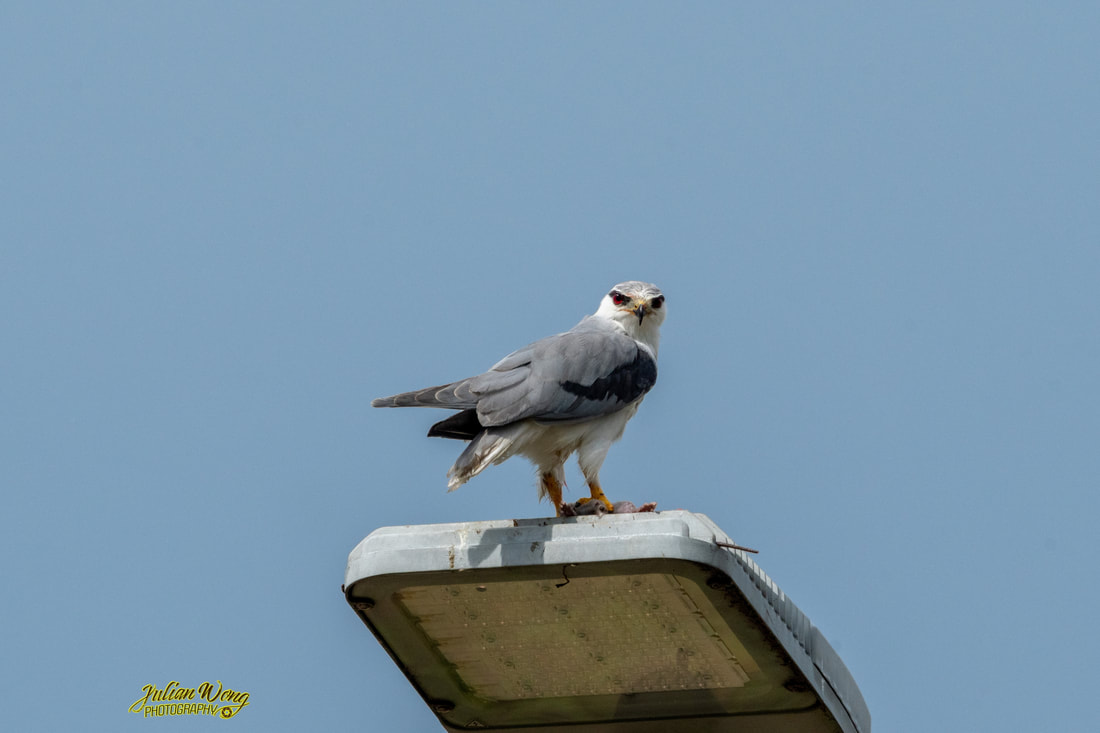
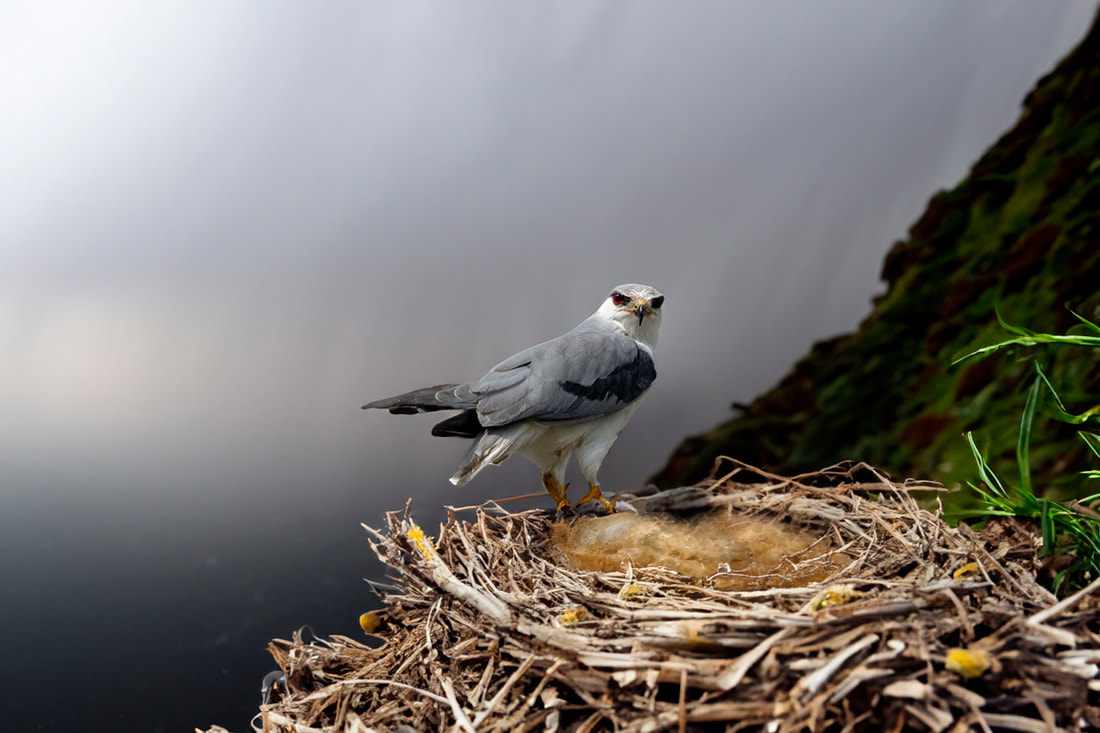
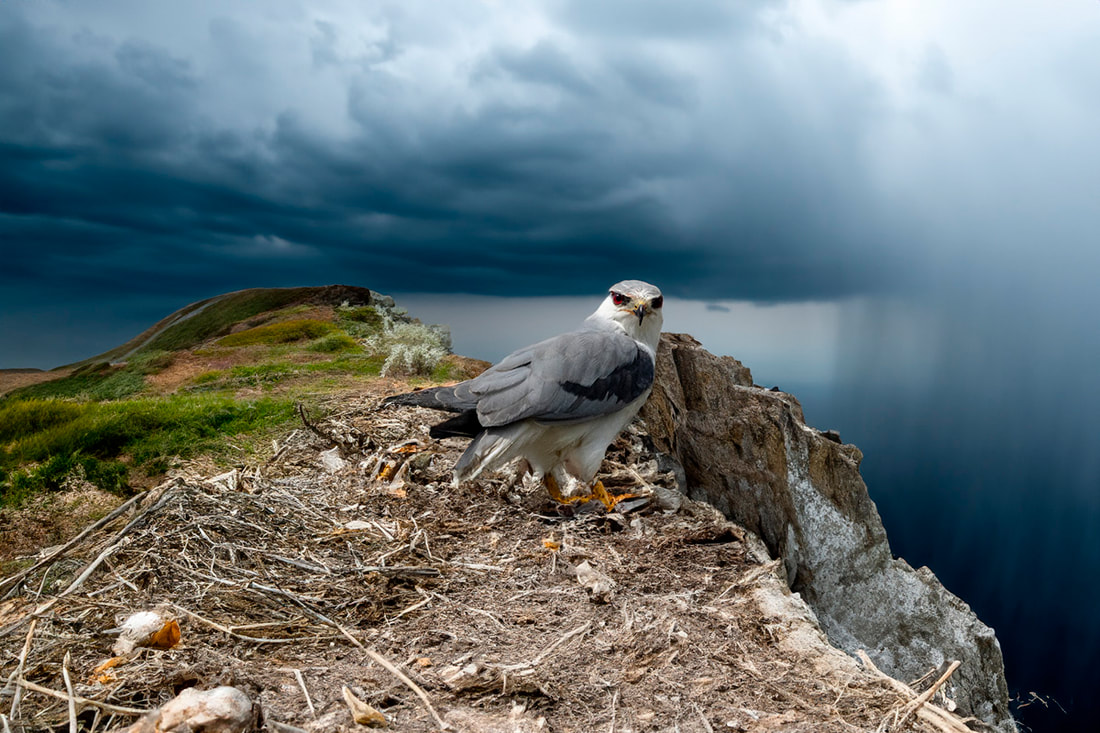
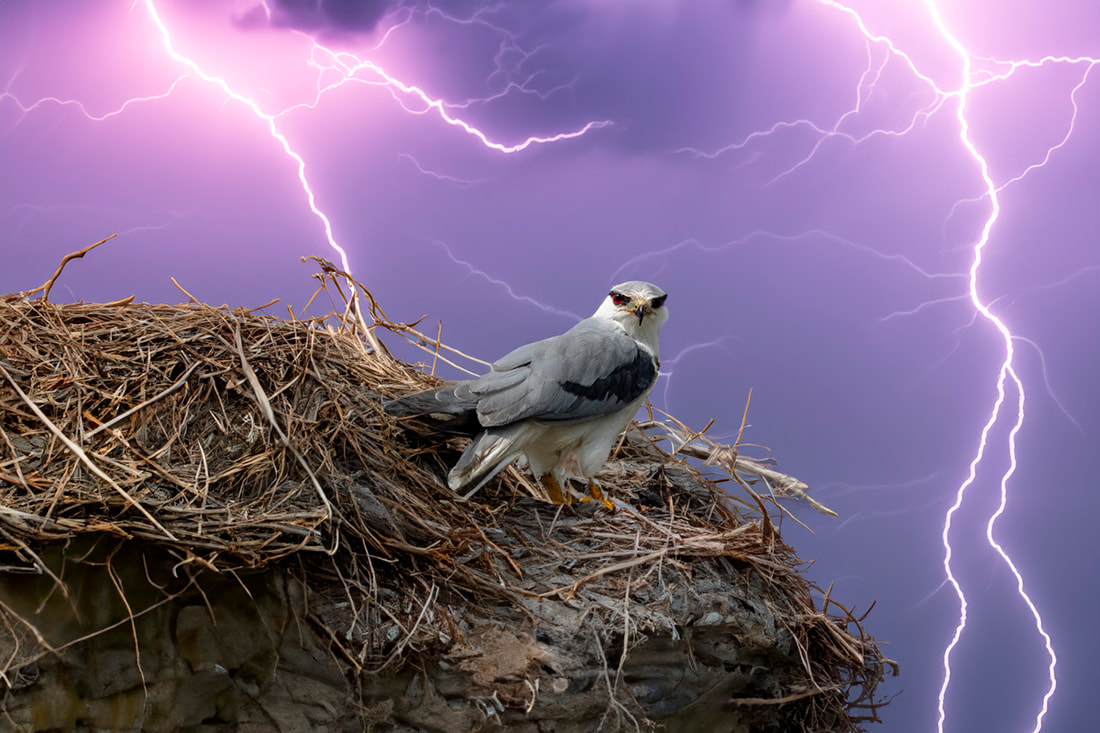
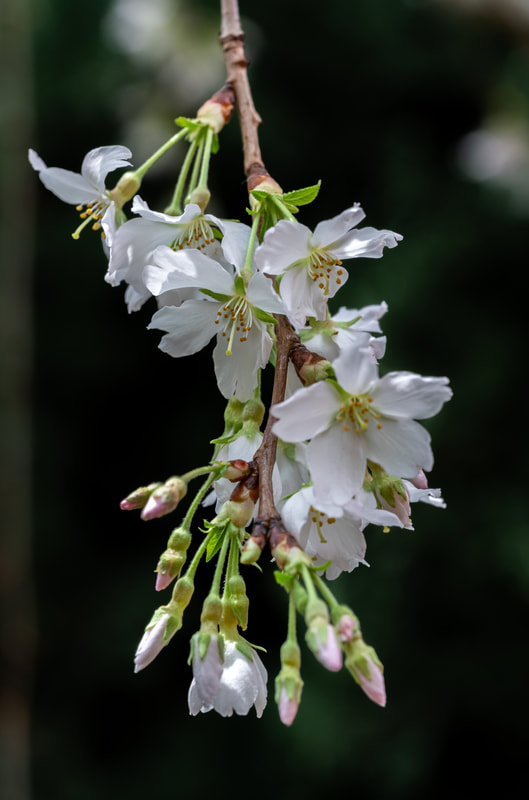
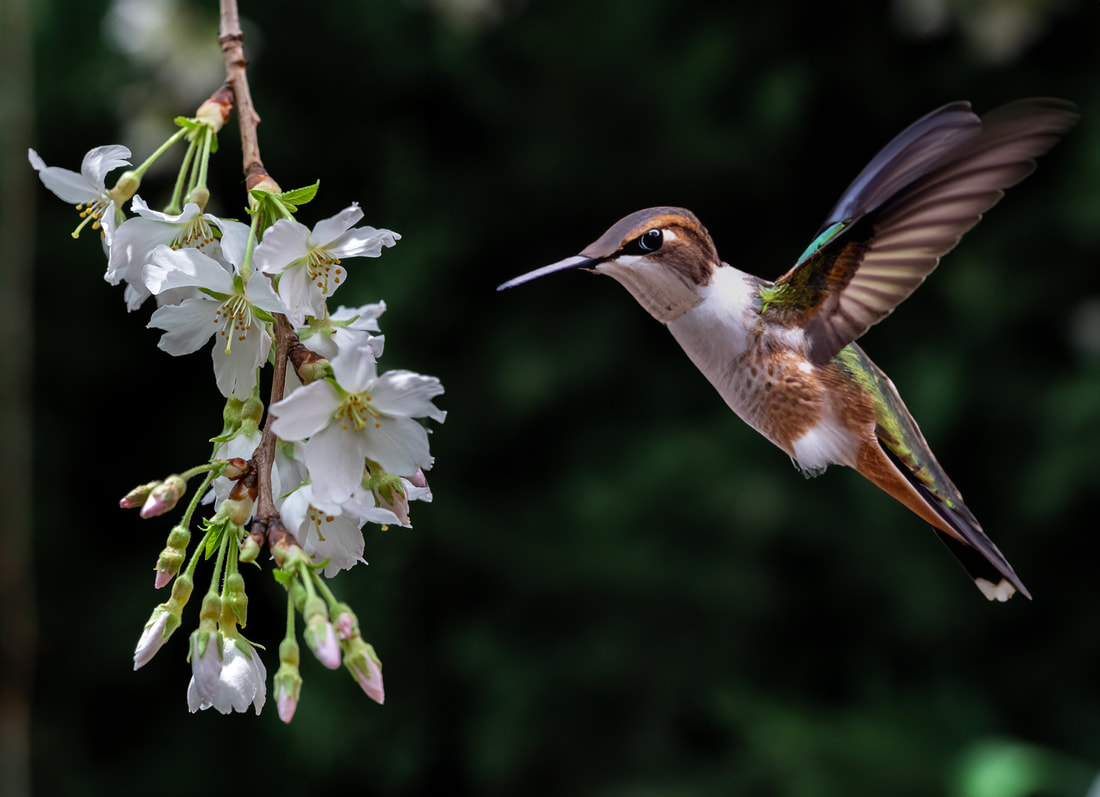
The new beta version 24.6 of Adobe Photoshop has just been released. I was curious as to how the new Generative Fill function using AI would work in the context of all the pictures pertaining to bird photography that I have been busy with the past few years. As I find out more about this incredible feature, here are just four ways in which I was able to apply the Generative Fill function in my area of bird photography. Experimentation 1: Removal of unwanted items. First off, in the course of taking pictures of birds out in the wild, there is just no way that you can avoid unwanted branches or leaves ending up as part of the background. Here is one example - the Blue-eared Kingfisher appeared out of the blue and with hardly enough time to adjust and move to a better location, I started shooting. No soon had I taken about a dozen shots, the bird flew off, never to return the rest of the morning while I was there. Despite many other attempts at the same location, the bird seemed to have disappeared from this its favourite perching branch. So it left me no choice but to put the new Adobe Generative Fill function to the test. And with just a few movements of the mouse to select the ugly unwanted branch at the background here is the result! I was really impressed as it would have taken me a lot of time and effort to get the same result, even with the new Remove Tool (newly added in the Adobe Photoshop version 24.5). Experimentation 2: Extension of cut-off images The next experimentation I tried was to extend parts of images that I shot that were inadvertently cut off due to my bad framing. Of course I could have easily gone back and reshoot if I wanted to - as was the case of this Blue-winged Kookaburra at the newly opened Bird Paradise at the Mandai Nature Reserve. But just for fun, I decided to try this seemingly simple exercise. At first I thought it was a trivial exercise but when I went about trying to do it manually, I gave up because of the many branches and leaves in the background. Added to this was the slightly cut-off head of the bird and that took up quite a lot of effort of trial-and-error. So when I tried the new Generative Fill, I was simply amazed by the results. By expanding the canvas and then selecting the additional area, I was able to fully able to restore the photo with just a few button presses. I was (and still am) lost for words! Not only was it able to generate three variations, it was able to generate three versions of the complicated background of leaves and branches! And the original image was a 50MP file from the Sony A1!!! Here is the result: If I had shown you the picture above without first showing the original cut-off image, I bet you would not have known that it was a generated image! It was even able to extend the blur leaf on the top left! This is simply astounding! Experimentation 3: Generation of backgrounds From here, things have just taken a quantum leap! Using Generative AI, I was able to write in plain English what I want to have as a background and the software will do the rest. Over the weekend I was alerted to the presence of the Black-winged kite over at the Gardens by the Bay, and when if finally flew in with its breakfast of a fat rat, it landed on a nearby lamp post. With that as the starting point I decided to remove the boring overcast sky (it has just stopped raining). Here are a few variations of backgrounds using the new Generative Fill function. First using the new Contextual Task Bar, I selected the subject (the bird), then clicked on the Inverse icon on the right, to select the sky. I then clicked on the Generative Fill button, typed in what I wanted to see, e.g. "nest at the edge of a cliff in a thunderstorm" and viola! Photoshopping will never be the same ever again! Here are some examples of the nest in a thunderstorm and lightning storm! Experimentation 4: Adding a generated image So this is just an extension of the experimentation above and instead of the background, I instructed the Adobe Photoshop software to generate an image. To start off, I used an old image of the cherry blossoms I shot at the Flower Dome some eons ago. Noting that the Generative Fill function was only able to generate images around 1024x1024 pixels (for the moment - Adobe has informed us that they will increase the resolution on subsequent updates), I downsized my image accordingly. Then using the Crop Tool, I dragged the canvas to about double the original width towards the right. After selecting the extended portion I simply hit the Generative Fill button, typed in what I wanted, for example "hovering hummingbird feeding on flowers" and again the software did the rest! So what do you all think of the new Adobe Photoshop Generative Fill function. Leave me a note in the Comments section. I would sure love to hear from you!
1 Comment
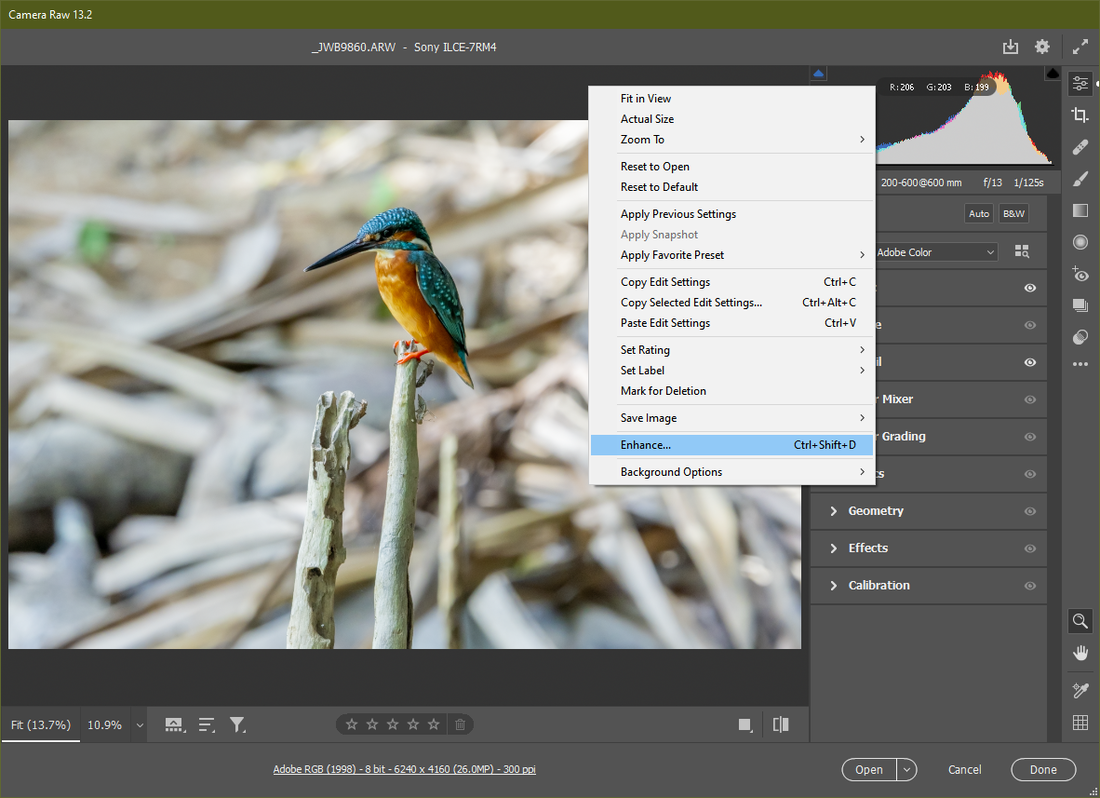
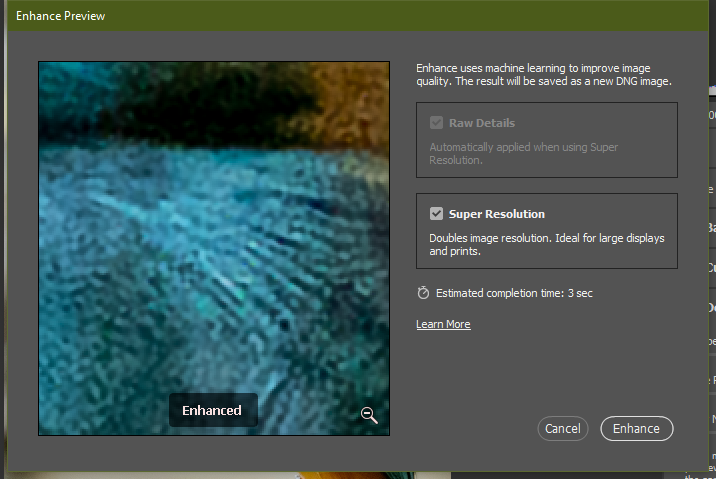
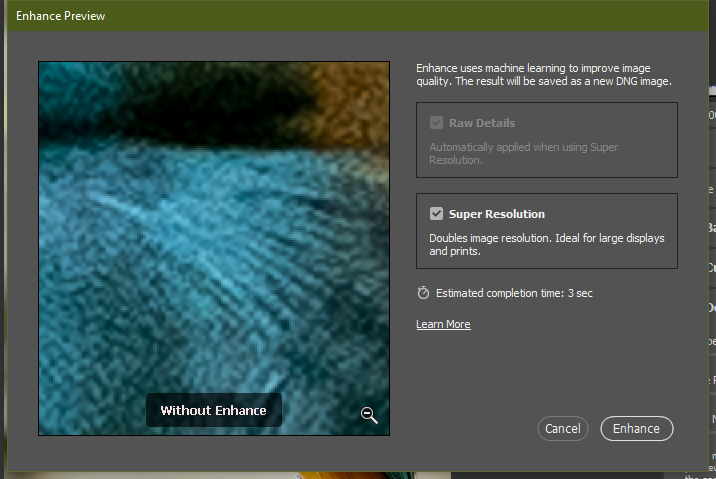
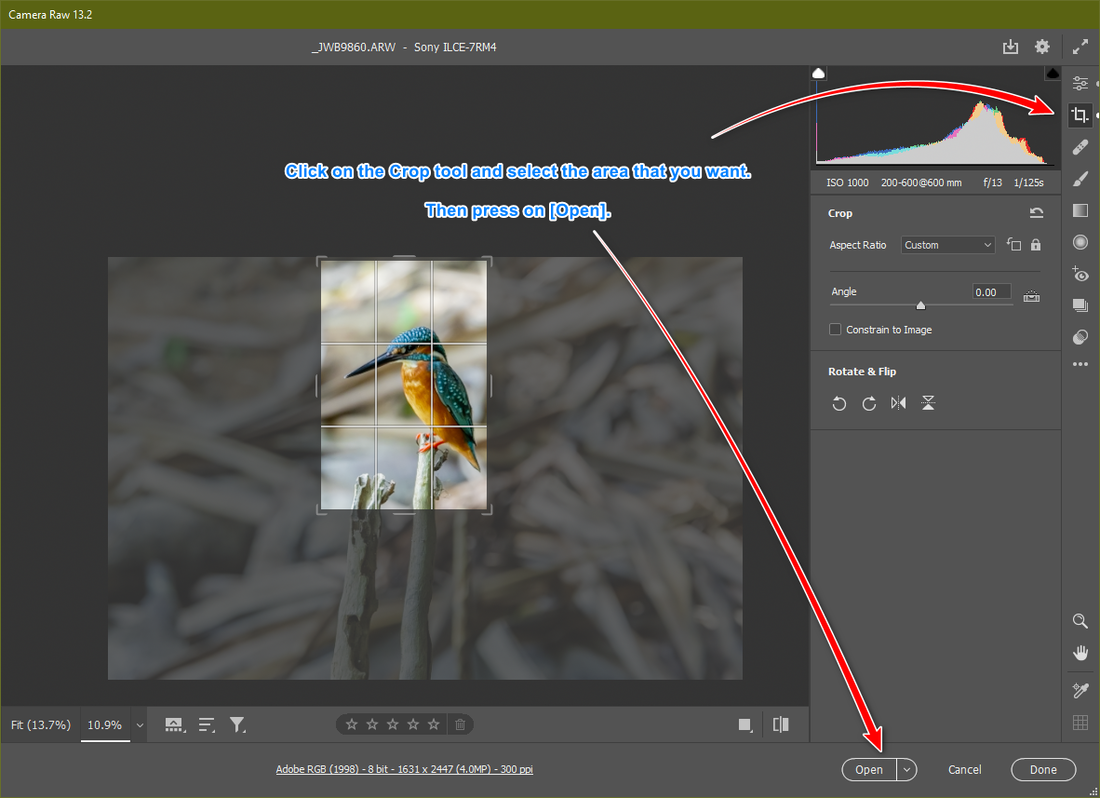
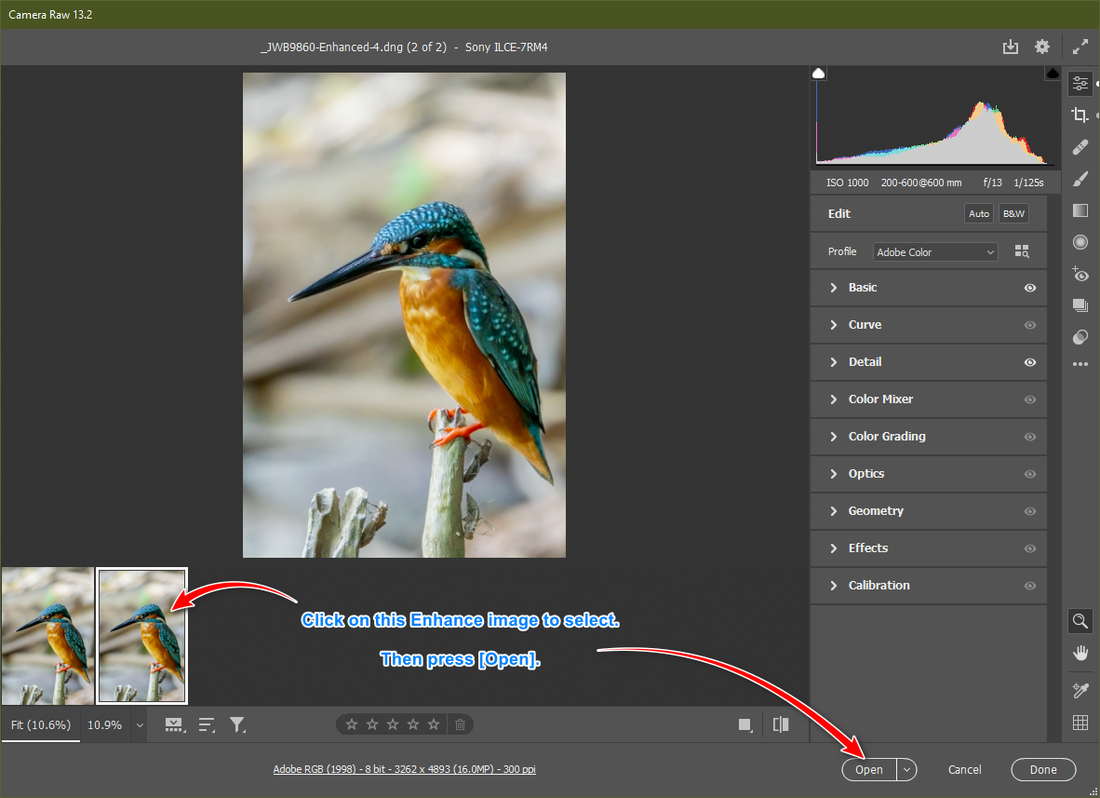
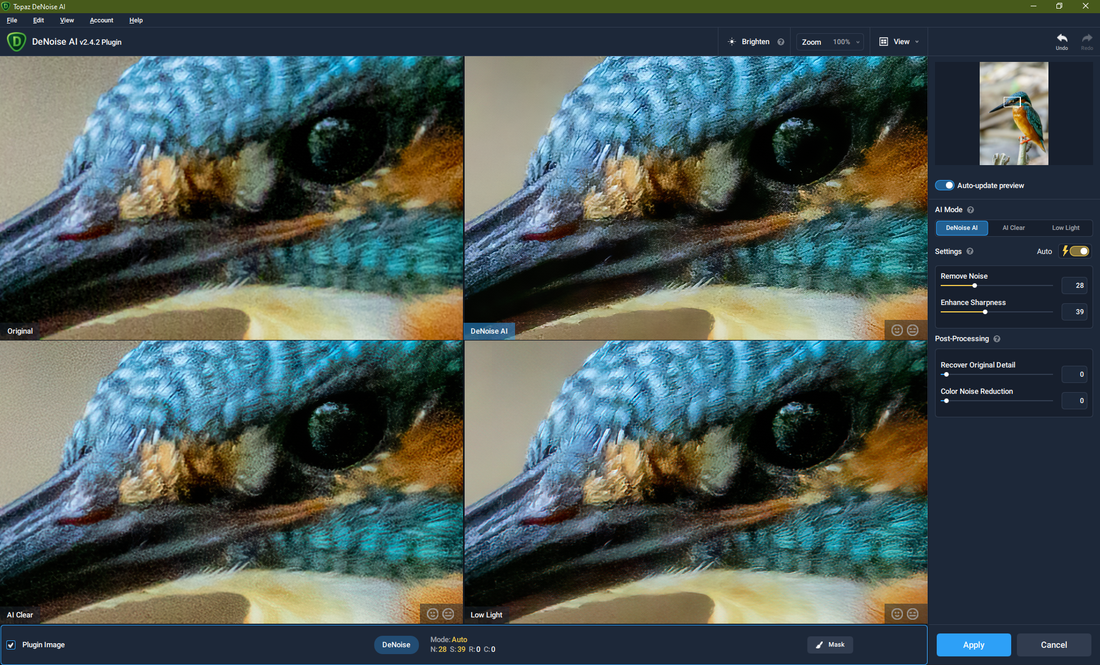
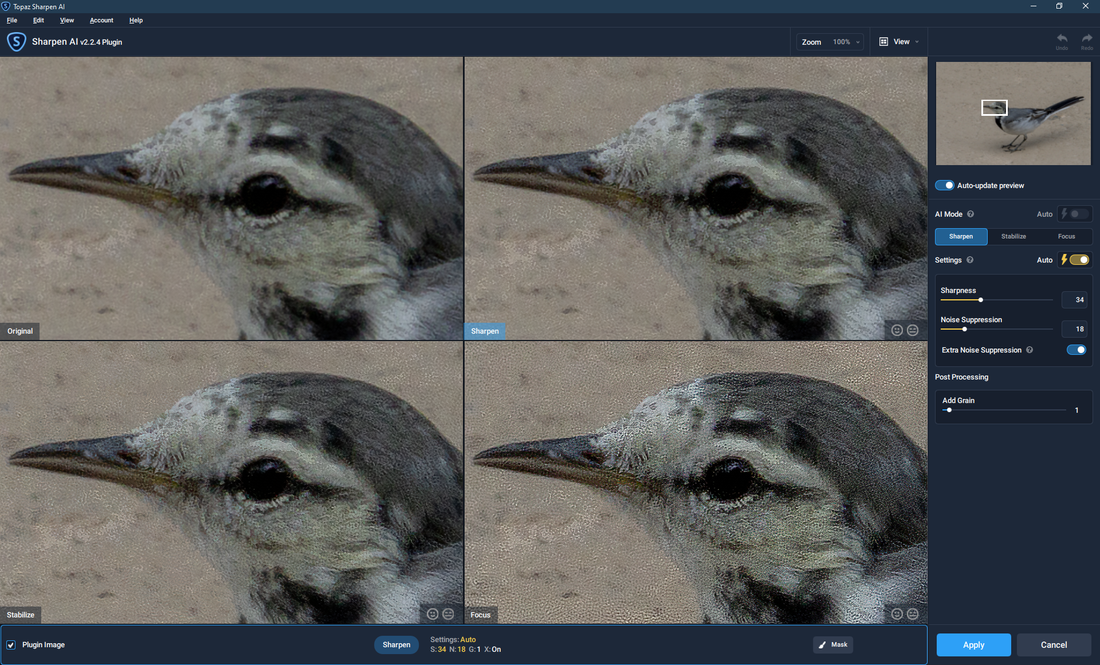
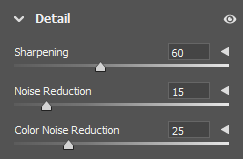
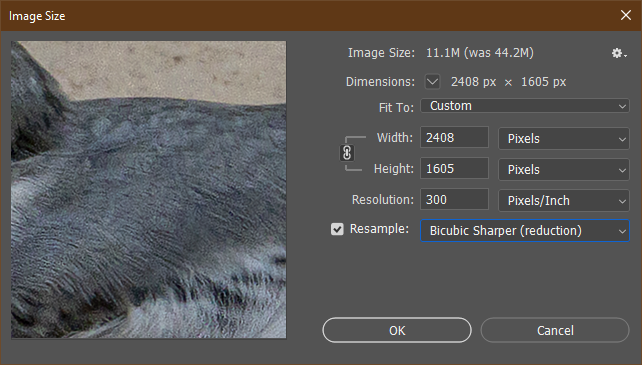
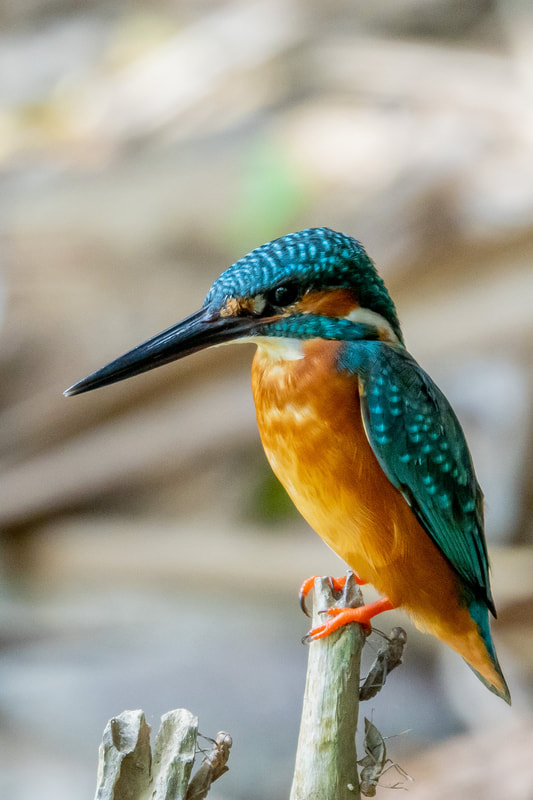
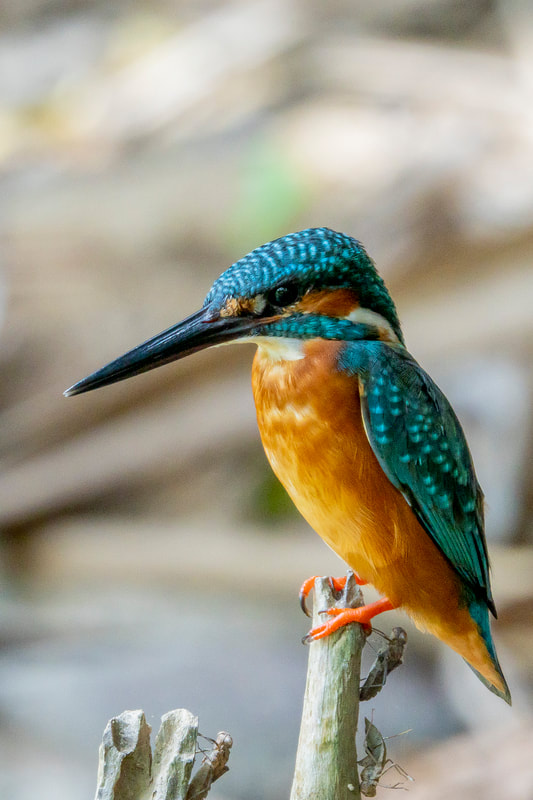
So the excitement over the past week has been the new Adobe Camera Raw 13.2 feature touting a quadrupling of your picture resolution using AI. Aptly called Super Resolution, I put it through its paces to see if it actually works on many of my photos of birds that were taken from a long distance back and needing a fair bit of cropping. There were a lot of mis-steps in the road to discovery, so I will guide you along so as not to repeat the mistakes I've made along the way. That said, here are the step-by-step instructions: Step 1: Open your RAW file (Nikon NEF, Canon CRW, Sony ARW, etc) using the latest Adobe Photoshop 2021 (release 22.3) and the updated Adobe Camera Raw (ACR) 13.2. Alas ACR 13.2 can only be installed if you have this new Photoshop version. Step 2: Right-click on any part of the image, select the Enhance function from the pop-up menu (See picture above). You will now see the Enhance Preview dialog box similar to the picture below: By clicking and holding on to the left button on this enlarged image, you can toggle between the Enhanced image and the Unenhanced image (see below). That way you can see the changes made by the AI-based Super Resolution function. You can immediately see the changes that will be made by this Super Resolution (SR) feature. Firstly you will notice that it added an amount of digital noise. This is one of the "benefits" of SR. After all, remember GIGO (Garbage In Garbage Out)? You cannot get something out of nothing and so if your image is noisy to start off with, you will end up with artifacting similar to the one above. But nevertheless, there are some noticeable gains - edges are more defined and overall, the image looks sharper. You can press the [Enhance] button here and the whole image will have a doubling of the horizontal and vertical pixel sizes. As I only want just a small section of the picture to be enhanced, I press [Cancel] here and proceed to Step 3. Step 3: To zoom in on the image, go back to the main ACR screen and use the crop tool to select just the section of the image that you want and then apply the SR enhancement. Step 4. You will now see two thumbnails of the cropped image at the filmstrip below the image. (See picture below). If you do not see this filmstrip, just press the [ / ] button on your keyboard. Now comes the important step - you must select the second image as this is the one that has the enhancement. You now have an image that is twice the resolution horizontally and vertically. This is just perfect if you want to print the image as you now have a file that is four times bigger. Further experimentations with this SR-enhanced image revealed some interesting facts. Firstly, if you think you can further enhance the image using Topaz Denoise AI or Topaz Sharpen AI, you can just forget about it. I came to that conclusion after testing many files. In fact Topaz just made a whole mess out of the images and I removed it from my workflow completely. Here is a sample using Topaz Denoise AI. So back to the original question - is there a benefit in all of the Super Resolution? Well yes, if you are wanting to print an enlargement from a file with not enough resolution to begin with. As for increased sharpness, as I discarded the use of Topaz, I experimented with the built-in Details function of ACR and found that I can increase the sharpness further with no visible penalties. Finally for an orange-to-orange comparison, I reduced back to the original size using Bicubic Sharper (reduction). The result speaks for itself. Have a look and tell me if it is all worth the effort! There are some noticeable sharpness that can be seen - especially to the ants (yes there are ants on the branches!) and the feathers of this Common Kingfisher. To the Pixel Peepers out there, do let me know what you think and whether is it worth all that work. As always, I welcome any comments - either positive or negative. We all learn by sharing. Update: 19th March 2021:
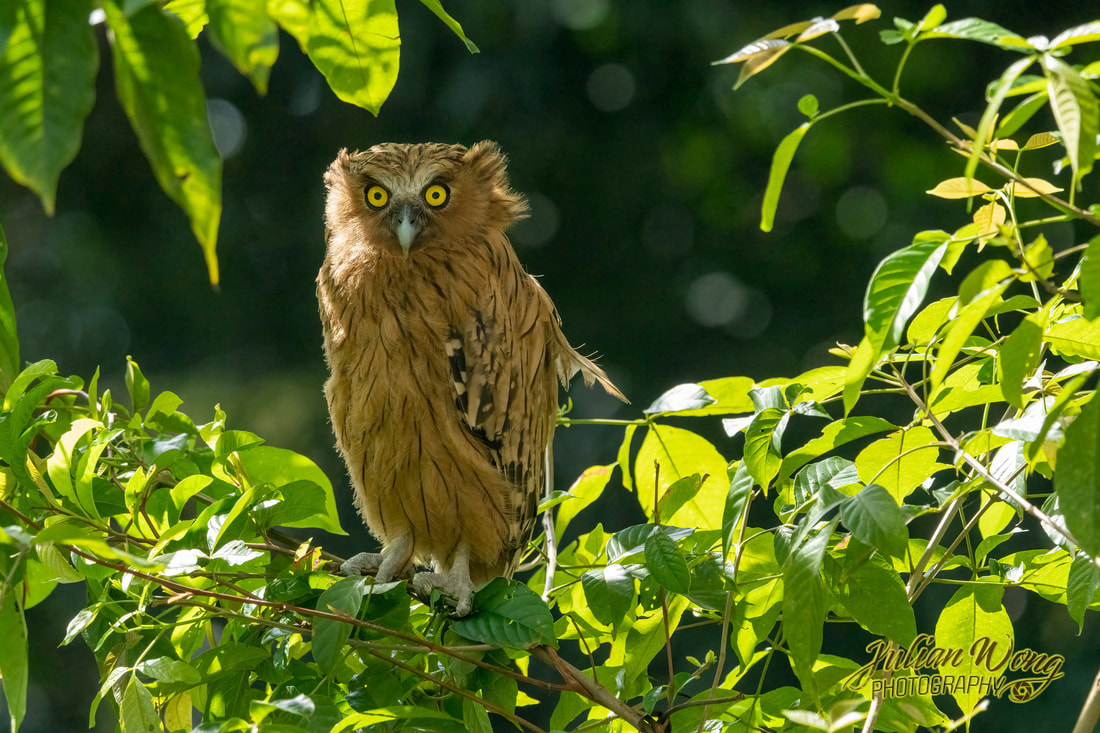
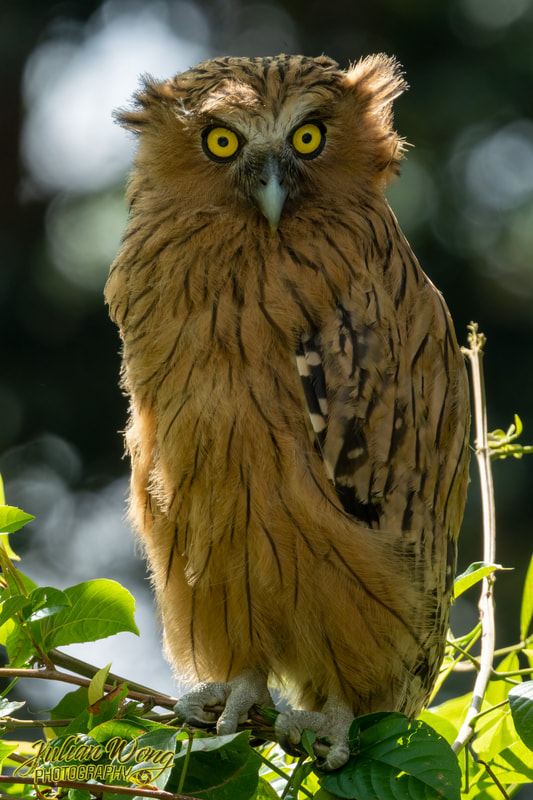
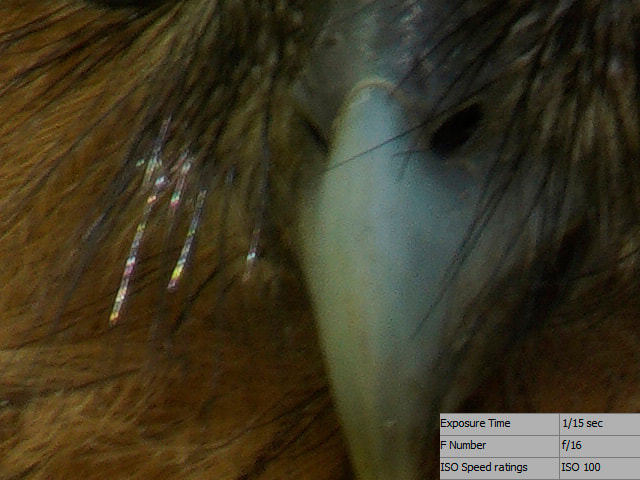
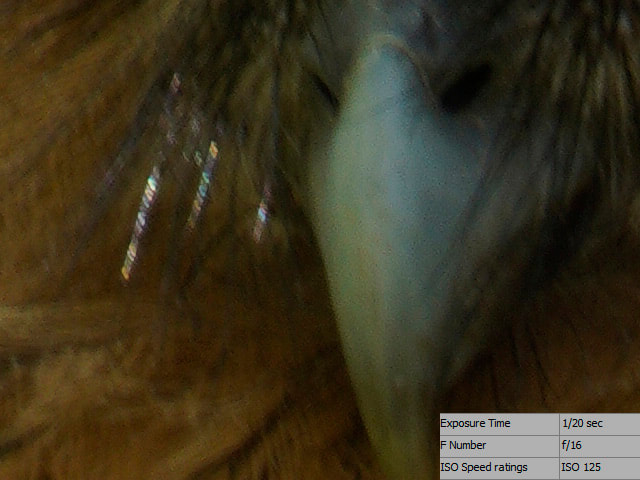
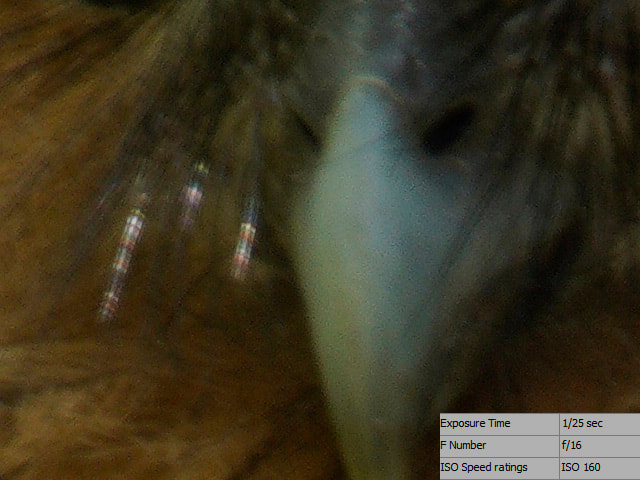
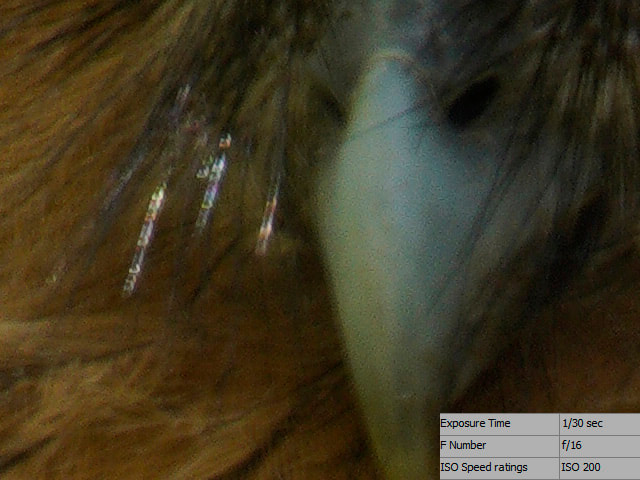
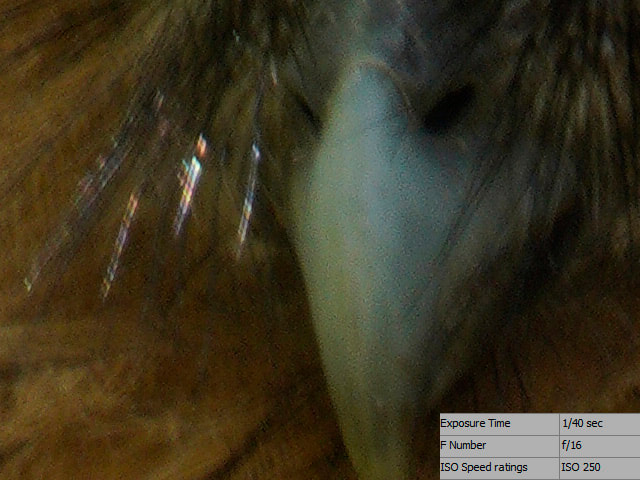
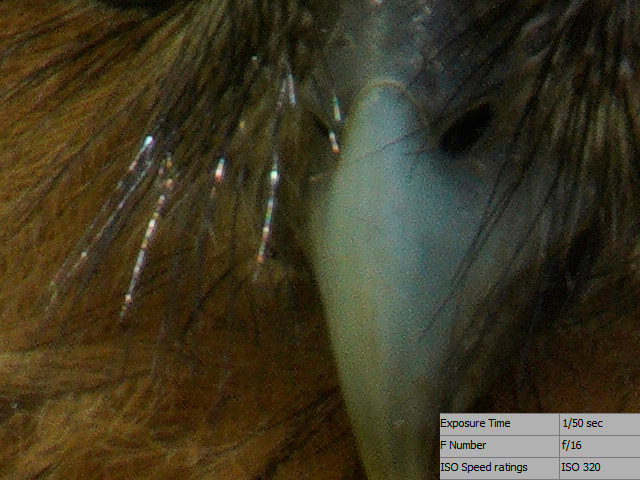
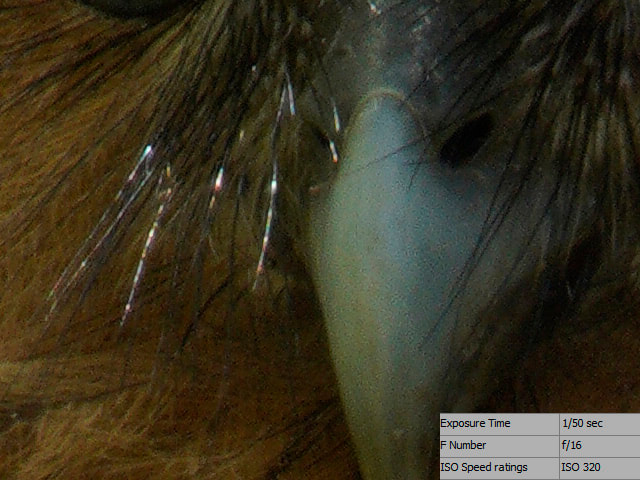
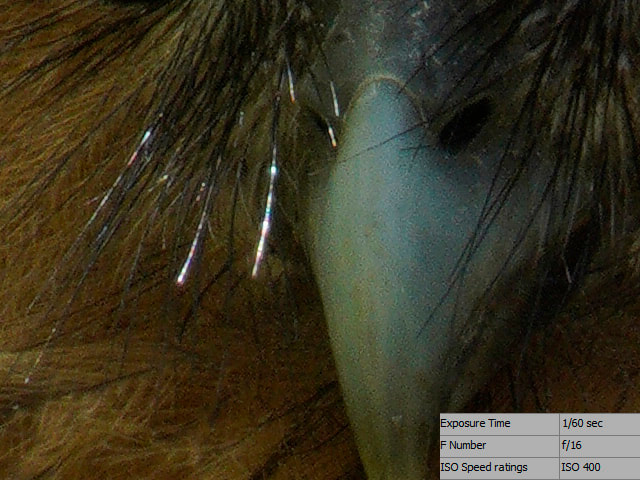
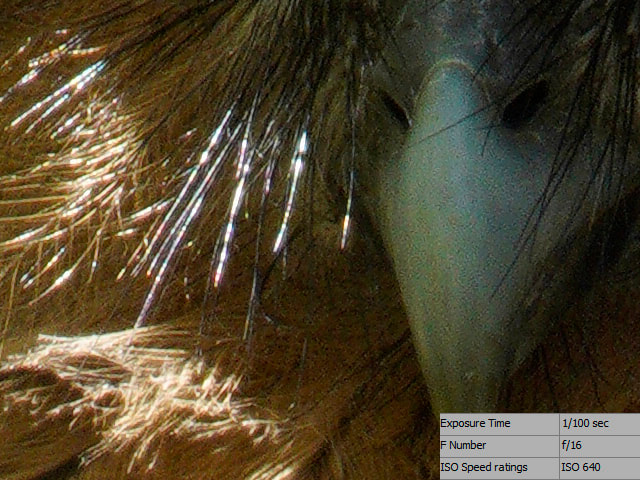
So the question that was raised was whether there are any benefits to be gained in running the SR enhancement over previous enhanced image over and over many times. Well, the answer is - No! I experimented with many images, stopped doing it four times and checked the results. There just was no noticeable benefit whichever way you want to review the image - either blowing up the original 4 times or reducing the 4x enhanced image back to its original size. So folks, don't waste your time. It may give you some benefits if you are dealing with very, very low resolution files like 500x500pixels, but for my birding photos shot using the Sony A7Riv, no! Full stop! I have been using my set-up for taking photos of birds for more than a year now. The configuration consists of my trusty Sony A7Riv with the FE 200- 600mm f/5.6-6.3 G OSS lens. Of late, I wanted to test the lowest shutter speed that I can set when taking birds that are perched. An opportunity came up when a juvenile buffy fish owl clambered down to a low perch on its maiden flight. The sun was almost overhead and lit up parts of the bird just enough for me to test this combo. This was not the ideal condition, but then again when you are shooting wild-life, you take what mother nature dishes out to you. It was breezy, with leaves swaying and branches moving. The juvenile was no help as it was moving erratically and observing the surroundings. The camera was mounted on a tripod (not the steadiest) and shot by pressing on the shutter release. It would have been better if a cable release or the RMT-P1BT were to be deployed, but again many situations just demand your immediate attention. The OSS setting was ON and set to #2. I found that turning it on or off makes no difference when using a tripod. I decided to turn the camera to portrait mode and switched to APSC mode (giving a crop factor of 1.5x at about 26MP). To get even closer, I zoomed the lens in to about 750mm. In total, the effective zoom setting was around 1135mm. I then started with 1/15th sec. at f/16 in order to hit the lowest ISO setting of 100 and then moved my way up all the way to 1/100th sec. All the photos here are JPEGS (set to fine mode) straight out of the camera without any enhancements by any software. They are cropped to 640x480 to have a zoomed-up enlargement. As you can see from the image above, at 1/50th sec. the results were very good indeed. For me this shutter is usable in the worst-case scenario where there is not enough light. However the probability of getting a good image is about 1 in 5, so it is still a hit or miss. At 1/60th sec, my chances of getting a sharp enough picture got much better, with 1 out of 2-3 images acceptably sharp. Still I am only at ISO400, so I decided to stretch it a bit more. At 1/100th sec, I was getting good odds in the number of sharp photographs that are keepers. The ISO noise of the 61MP Sony A7Riv is beginning to show, but is still very acceptable. If needed I can then run Topaz Denoise AI to completely eliminate the slight graininess.
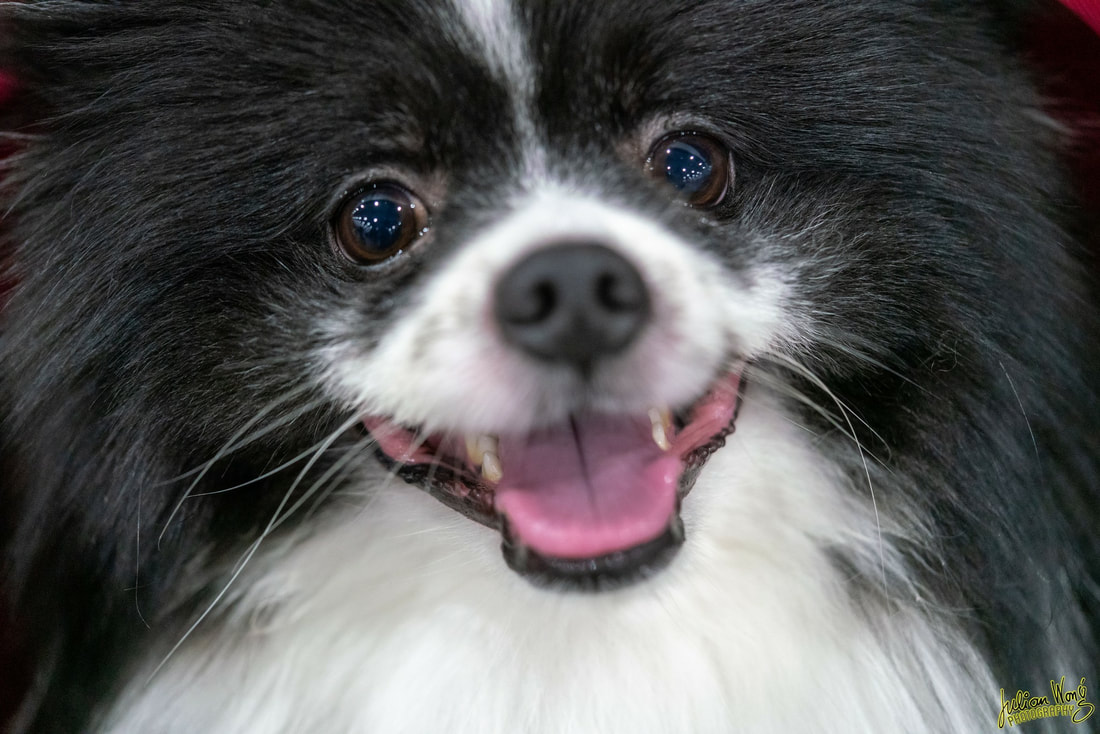
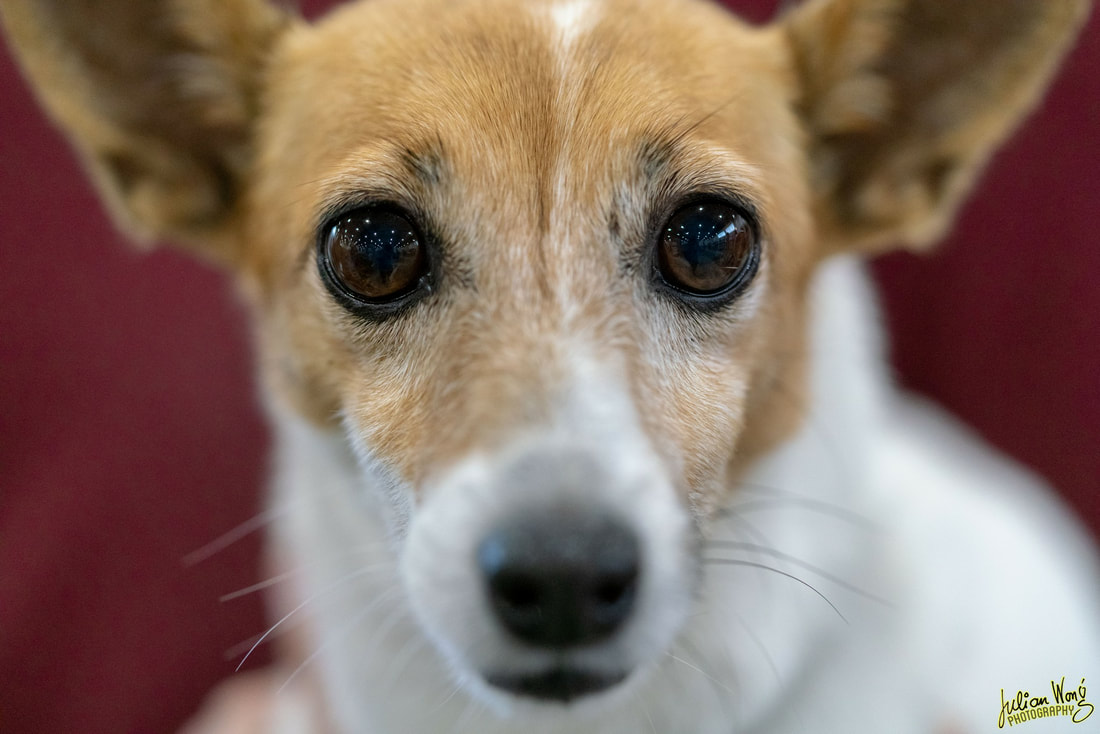
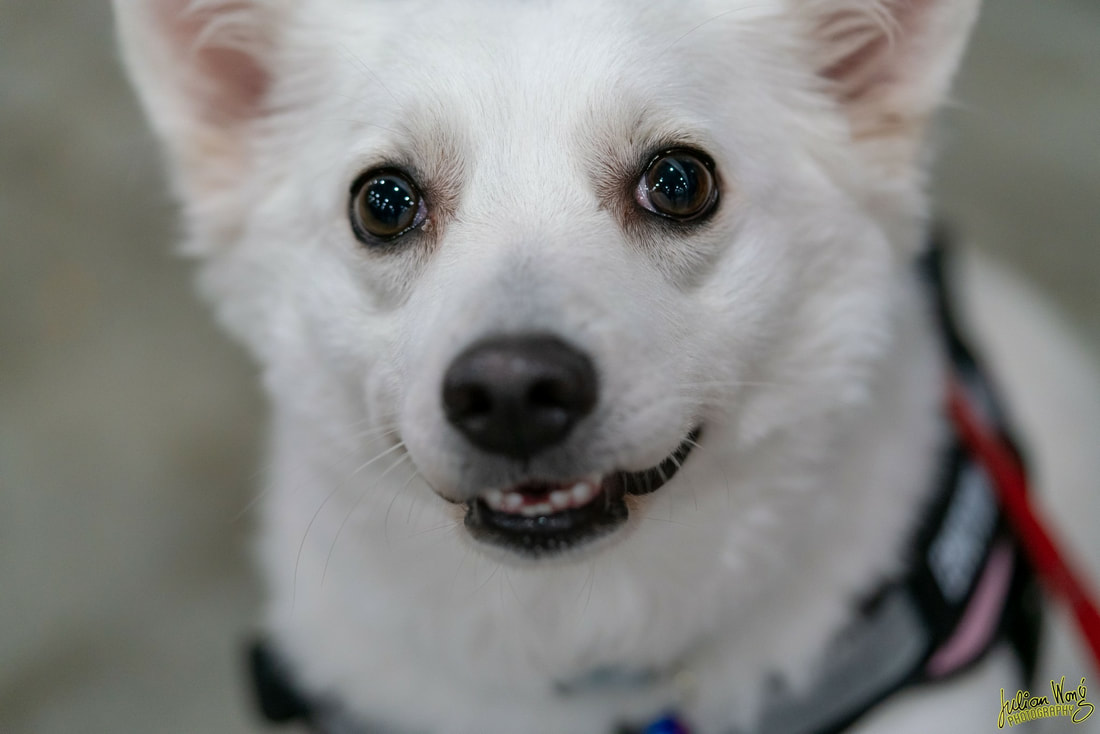
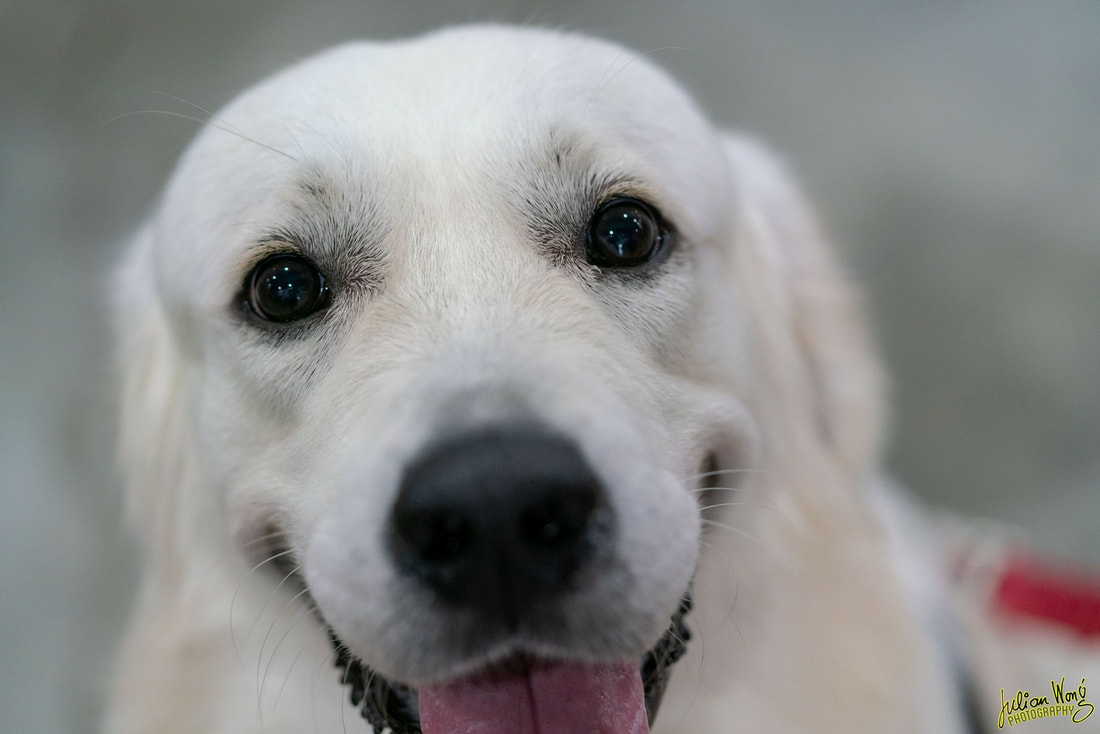
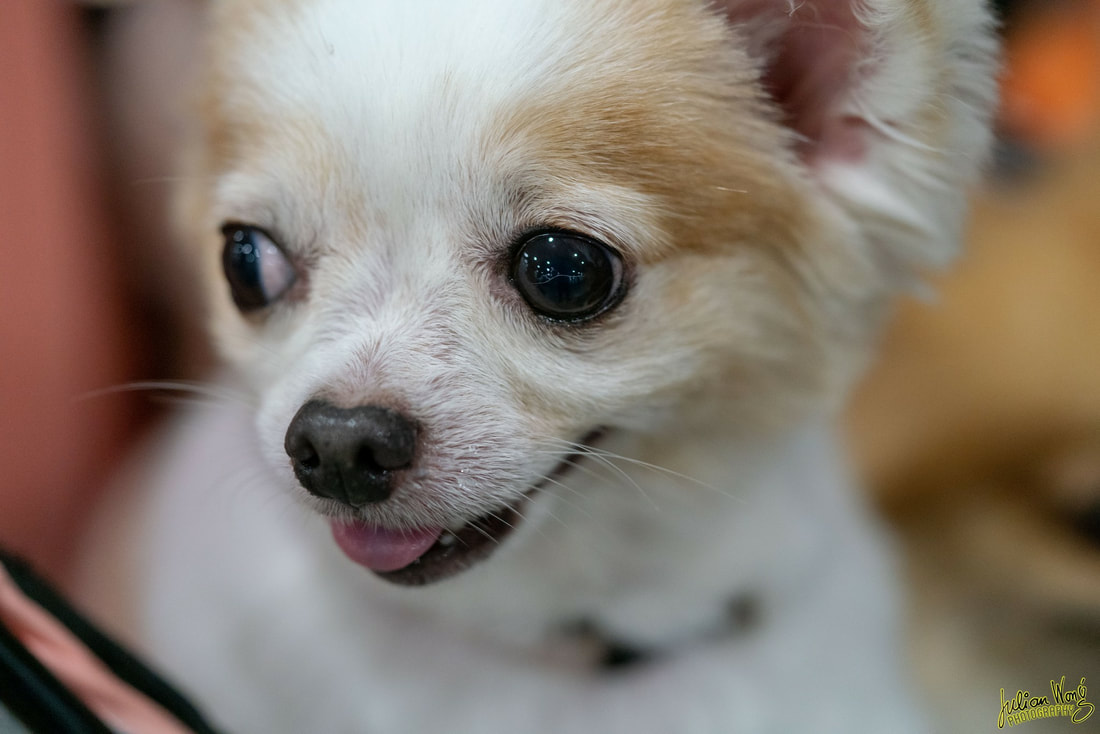
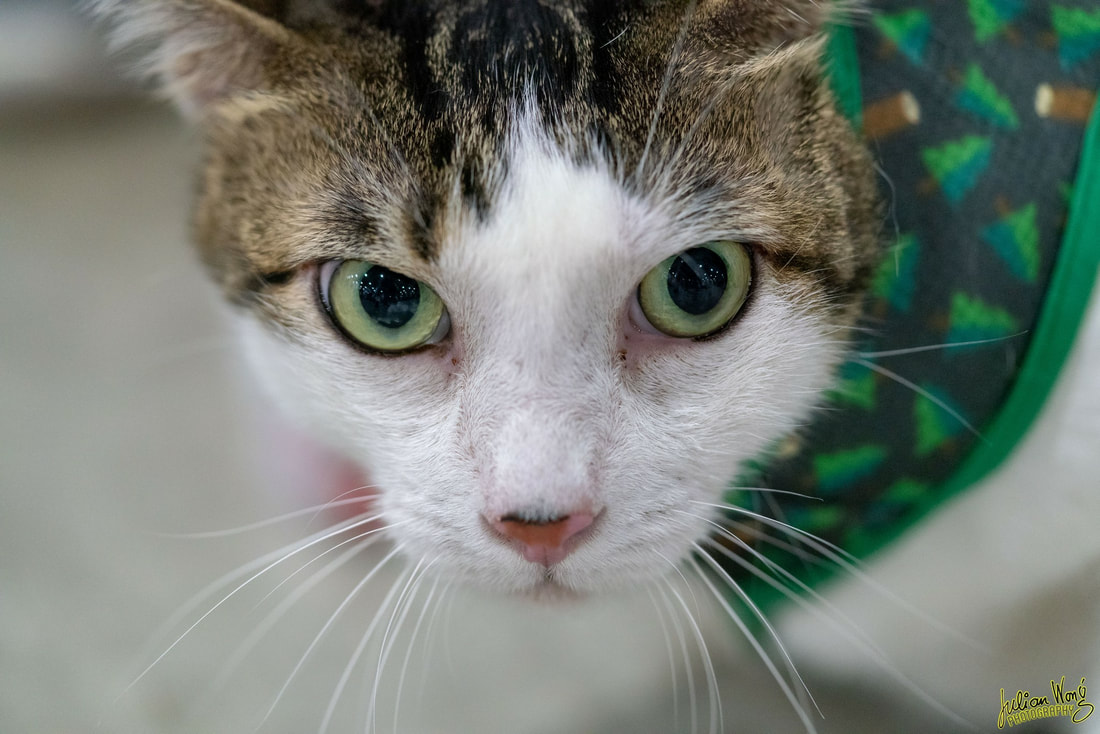
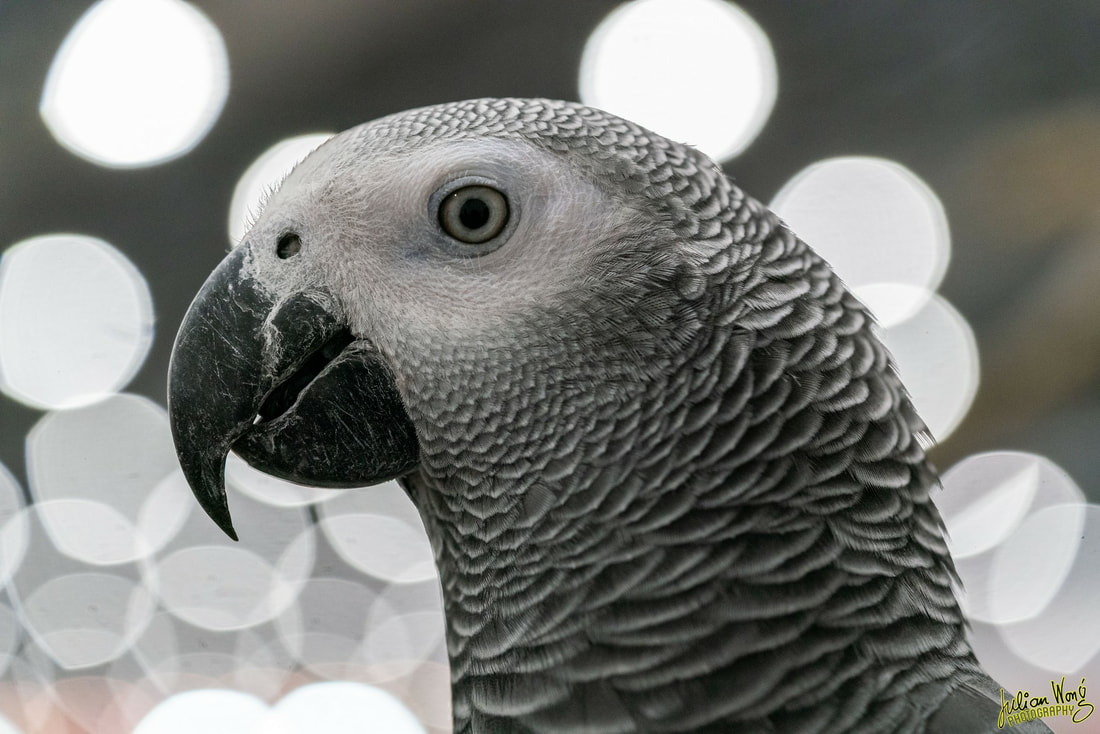
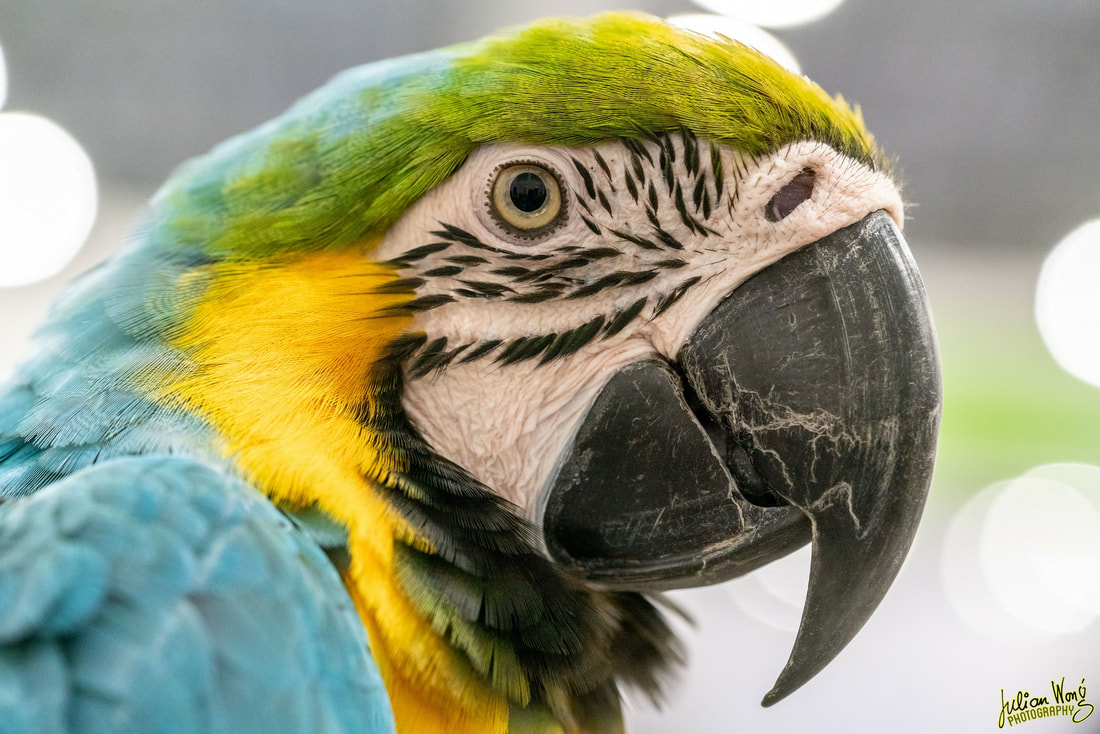
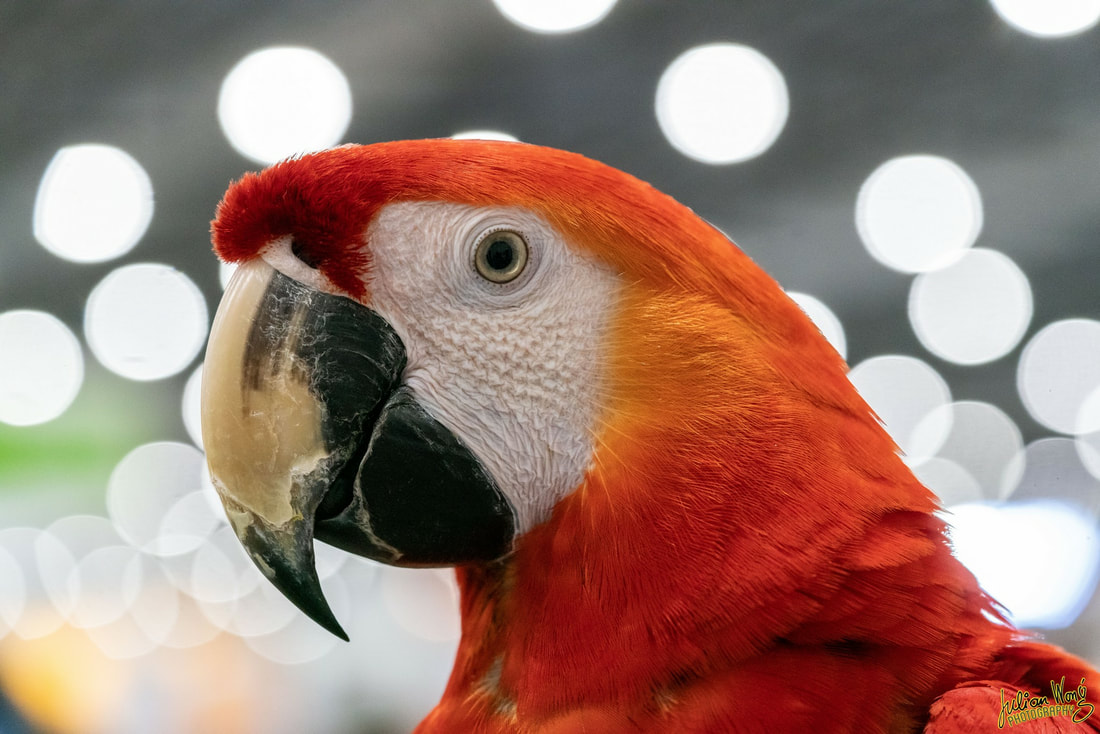
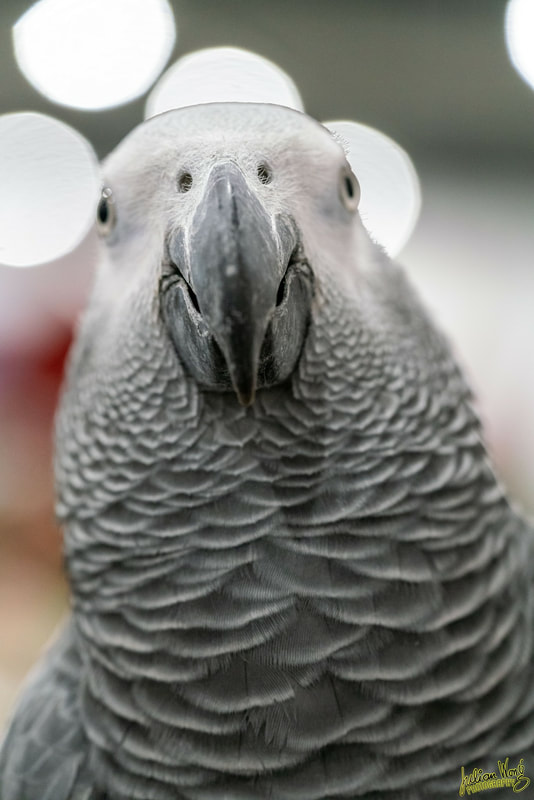
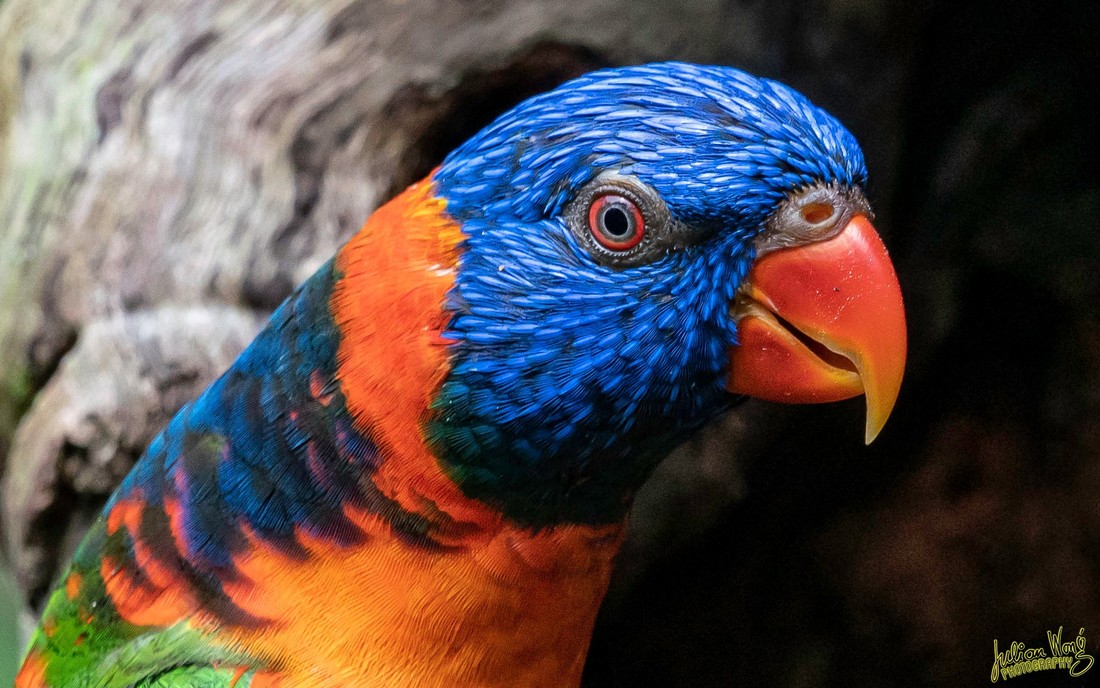
Interestingly, this is also a good test of the amount of digital noise at the various ISO settings. At ISO640, the image is more than acceptable, and I was able to go as high as ISO 6400 and still maintain a respectable image quality on the Sony A7Riv. But alas, that is about the upper limit of my tolerance, and in the worse case scenario with really poor lighting conditions, ISO8000 is about the max that I will go. Do try you own shutter speed tests, that way you know the limits of your camera and lens combination. Let me know what you think and I always welcome all your feedback! In the previous post, I tested the real-time eye AF on humans. As there was a pet show over the weekend, I decided to head over and test out the other feature of the new firmware 3.0 for the Sony A7III and A7RIII. For this test, I decided to use the slowest of my Sony-branded lenses - the FE 90mm f2.8 Macro G OSS lens. I use this lens predominantly for what it was primarily intended - macro photography. Sometimes, though, I would take it out for portraitures as I find the bokeh at f2.8 way more pleasing than my 24-70GM. However, during many these shoots, I found that the speed of the auto-focus mechanism just a wee bit short of my liking. So upon testing the lens on the new firmware 3.0, I was very pleasantly surprised that the lens now focuses much faster. Not only that, the real-time eye AF on my human subjects are just spectacular. So now my FE 90 macro has a new lease on life - being that of a portrait lens. And for that, the sharpness is beyond comparison, coming up just second to the FE 85 f1.4 GM according to the folks at dxomarks. So how did the new firmware 3.0 live up to its claim of a real-time animal eye AF? Well, just one word - incredible! The results speak for itself! For dogs at least, no matter what breed, colour or size, every shot was spot-on right to the eyes of the subject matter. All of the pictures were shot fully wide at f2.8. Even when the dogs were not looking straight-on, the real-time animal eye AF system worked flawlessly, producing shot after shot of perfectly-focused pictures. Feline lovers too rejoice! The animal AF system works on cats as well. There weren't too many choices of animals to shoot in the pet exhibition, so I will test on other animals in the weeks ahead. One thing the show had were colourful parrots and unfortunately the animal AF is a hit-and miss and it is not always a lock-on to the eyes of these birds. The animal eye AF focus can be tricked. In this straight-on shot, the AF mistook the nostrils as the eyes and locked onto them instead.
The most highly anticipated Sony firmware update is finally here! Firmware 3.0 for the Sony A7RIII and A7III were released on 11th April 2019 and I have been putting it through its paces. This is an enhancement of the eye-focus functionality that has been a key selling point for the Sony A7 range of full-frame mirror-less camera. But alas, the competition in the form of the Nikon Z 6 and Z 7 as well as the Canon EOS RP has been slowly creeping up. So, in response, Sony has released firmware enhancements for their A7III and A7RIII cameras. These enhancements do not disappoint and have put Sony way ahead of its competition yet again. This real-time eye auto-focus (AF) system is a joy to use and is the result of incorporating artificial intelligence (AI) to detect and focus on the human eye. By using machine- learning algorithms and feeding it with millions of images, Sony was able to create a system that is able to detect and focus on the human eye. What a difference a week makes! In a photo shoot last week, I did get several some off-focused shots in instances when the hair was in front of the model's eyes. With the new firmware 3.0, this was completely eliminated. Every one of my photos had the focus of the eyes spot on! I simply put the camera to the AF-C (continuous) setting, half-press the shutter release and a square box first appears as it detects the face. Then in a split second the system zooms in on the eyes of the model. Even when the subject matter was looking up or down, or looking away from the camera, the AF was spot-on. I even tried moving to one side so that only one eye was visible but that did not trick the AI system one bit. Next I tested the system on a dimly-lit, partially covered face with only the eyes exposed. But even this extreme case the AF system performed flawlessly. It was virtually like owning a new camera with an AF system on steroids! Nothing I could throw at it was able to make it foil up. For me, it is an indication of things to come. The battle is not only on who makes the best lens or camera system. It is also about which manufacturer is able to make major advancements in the software of their system.
So for now, I await eagerly the response from the competitors and whether or not they are able to incorporate this vastly superior AF feature into their new mirror-less systems. As for the rest the like of Olympus, Panasonic Lumix and Fujifilm, I seriously wonder if they are able to survive this new battlefront. I will be putting another feature of the Sony firmware 3.0 to the test in the weeks ahead - the animal eye-focus function. Just a word of caution - I tried it on birds and it does not work. Worse, it slowed down the AF of my Sigma 150-600 lens with the MC-11 adapter
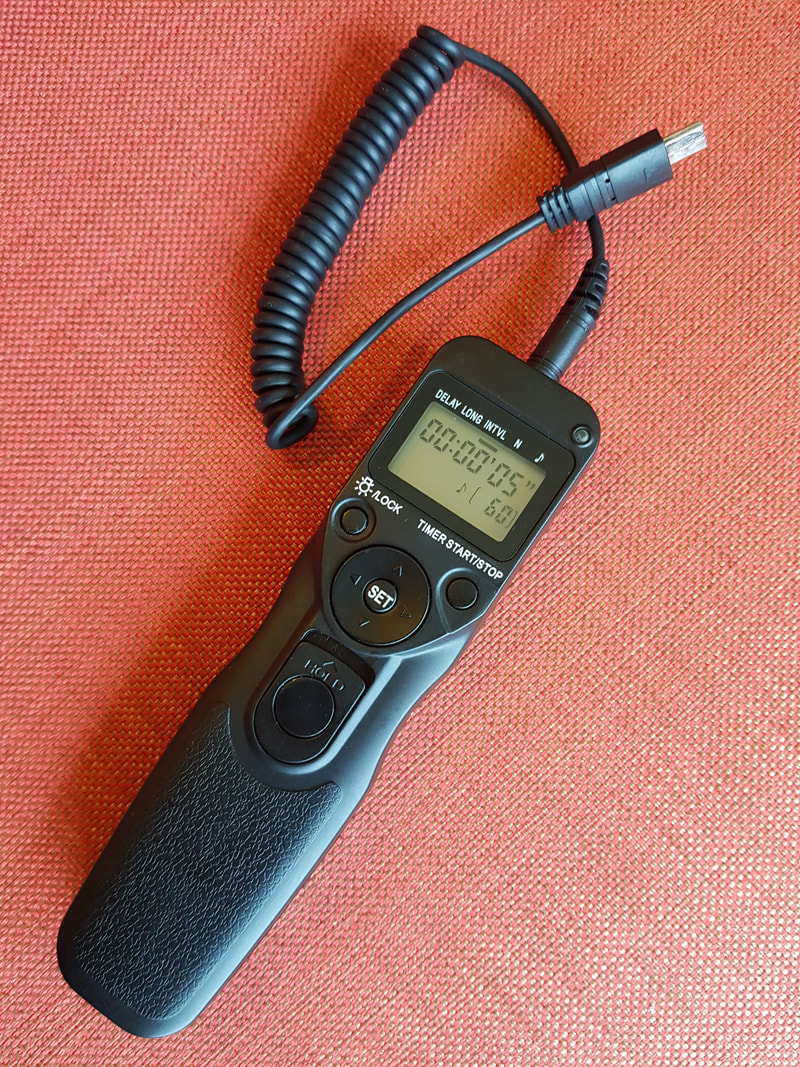
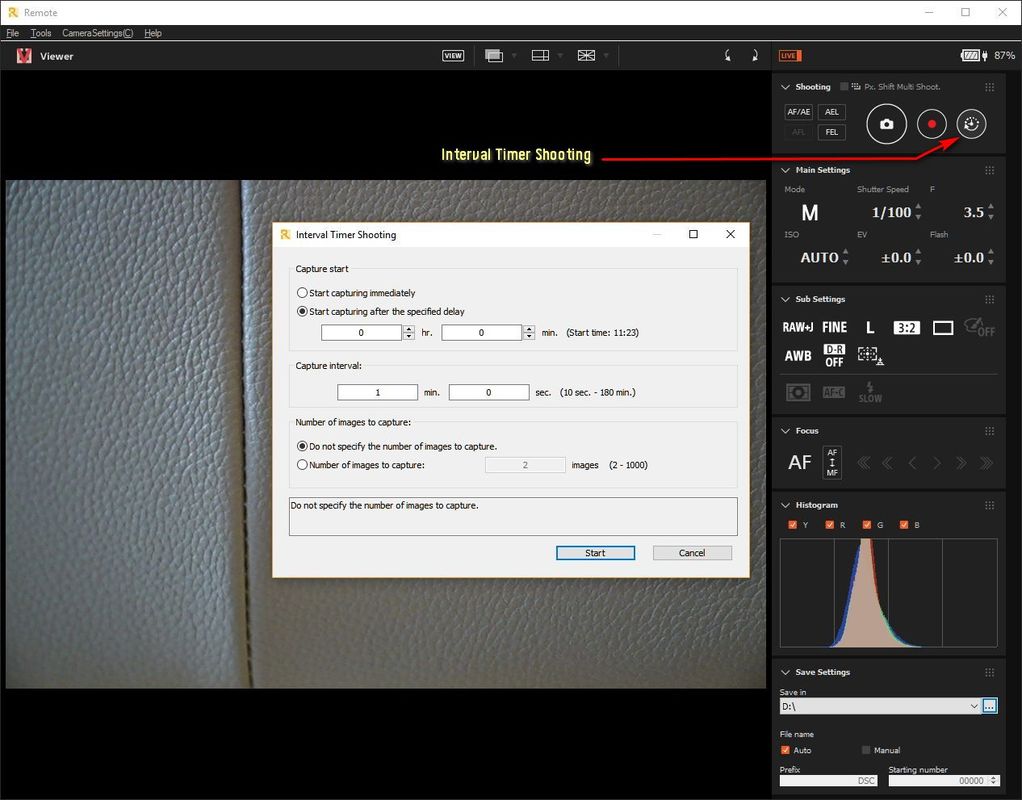
More than a year ago I posted the many ways of shooting time lapse using the Sony A7RIII. It seems like the folks at Sony heard my pleas as well as those of a million or more A7RIII users - the need for a built-in time lapse, interval shooting capability.
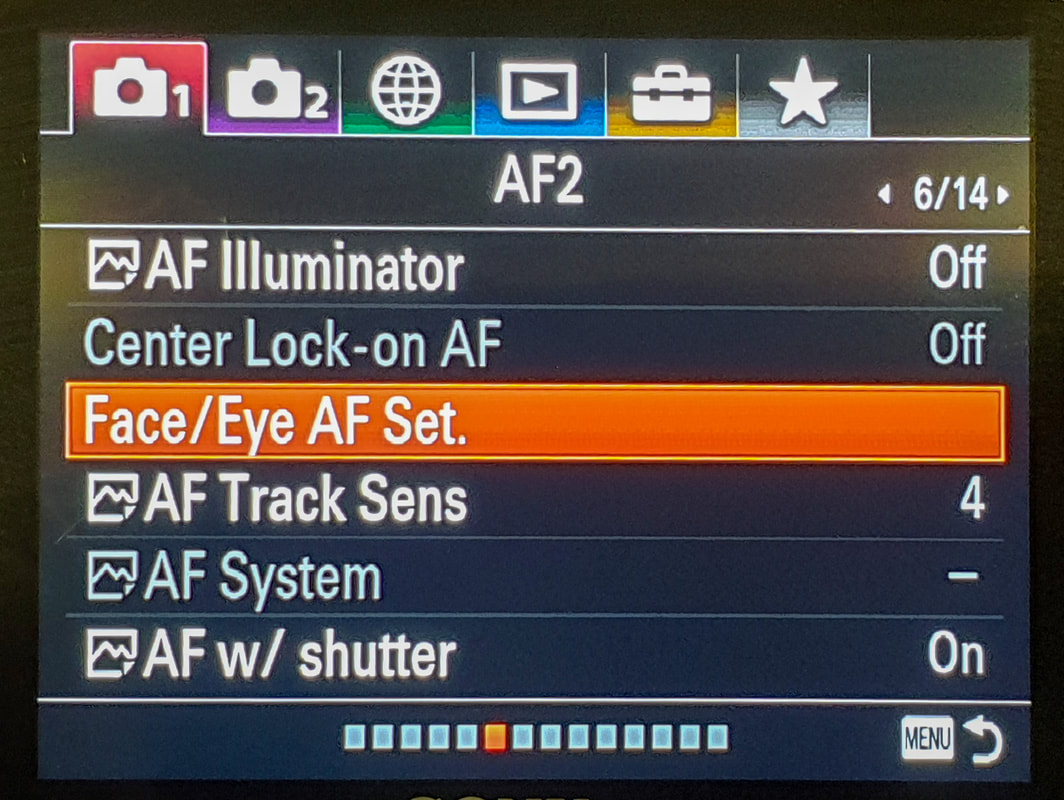
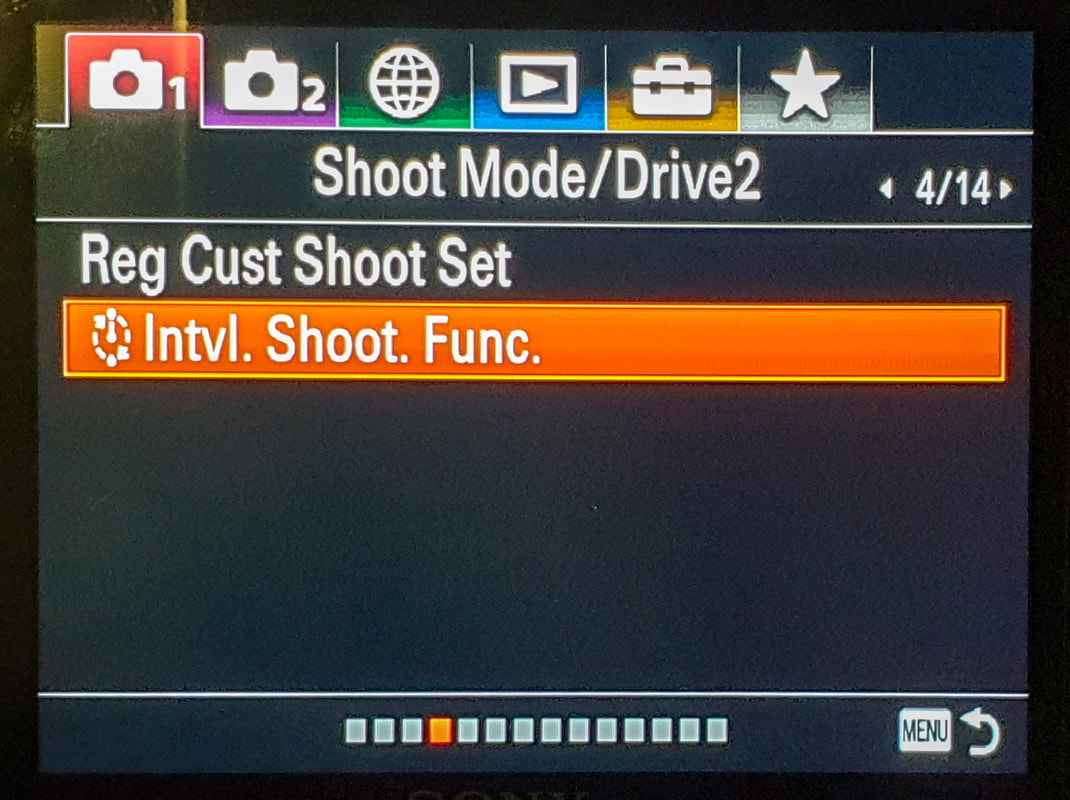
Well, today, Sony released the latest firmware 3.0 and I spent no time in updating from my old firmware 2.1. And lo and behold, I can now get rid of all the pesky intervalometers for good. The new Interval Shooting Function can be accessed from the Camera 1 menu, page 4/14 (see below).
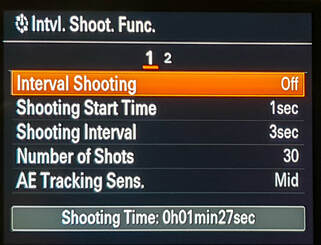
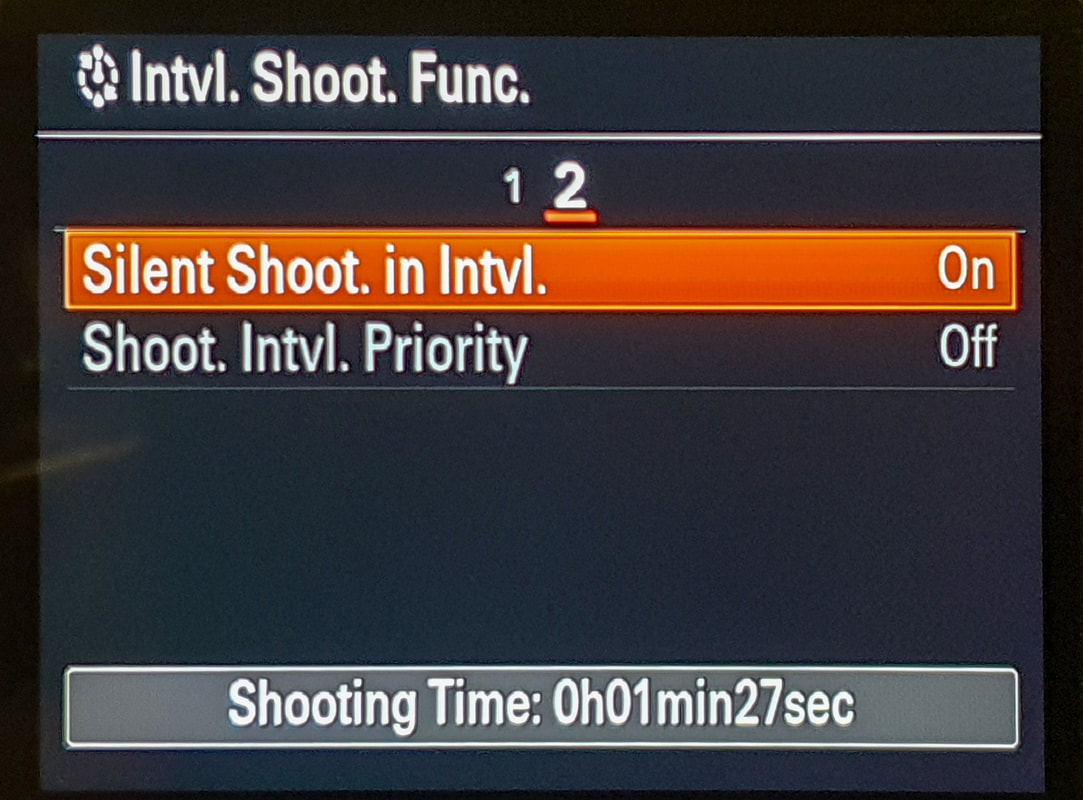
Upon clicking into that menu item, you see two sets of settings:
Interval Shooting: On/Off (I assign this to a custom button to quickly turn on or off). Shooting Start Time: From 1 second to 99 minutes 59 seconds Shooting Interval: From 1 second to 60 seconds Number of shots: From 1 to 9999 shots AE (Auto Exposure) Tracking Sensitivity: High/Mid/Low Silent Shooting in Interval mode: On/Off Shooting Interval Priority: On/Off A nice feature, is the Shooting Time calculation at the bottom to show the actual total time it will take to complete your shoot.
Here is the first test done using the new Interval Shooting function:
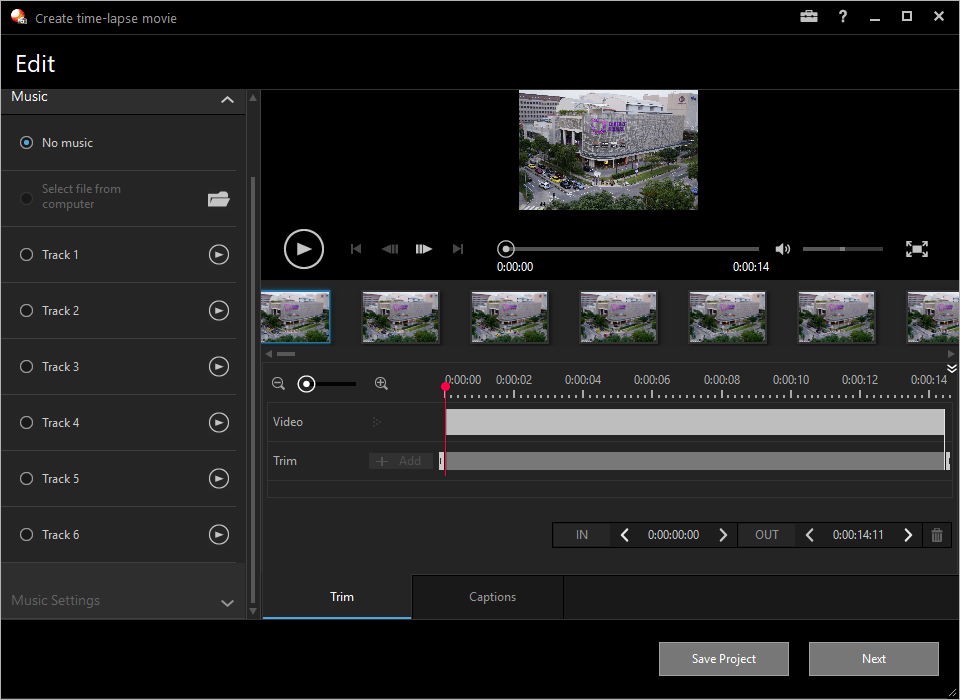
- Shooting Interval: 5 seconds - Number of Shots: 360 Shooting Time: 30 minutes. The images were then put into the new Imaging Edge software. There is even an option to add a musical track to the final rendered video.
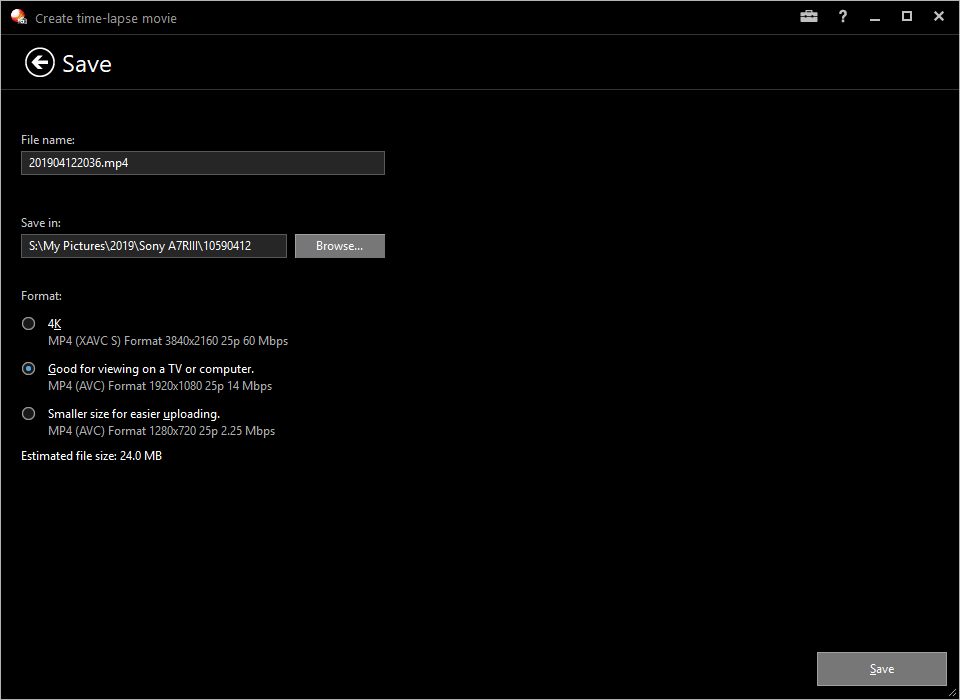
Finally, you can save the file in the top 4K resolution (3840 x 2160) at 25 frames per second, creating a stream of 60Mbps.
I downloaded the video into YouTube, but unfortunately, a lot of resolution is lost. Here is the link to the file:
For now, I am fully satisfied with this new firmware feature and will test it further in the days and months ahead.
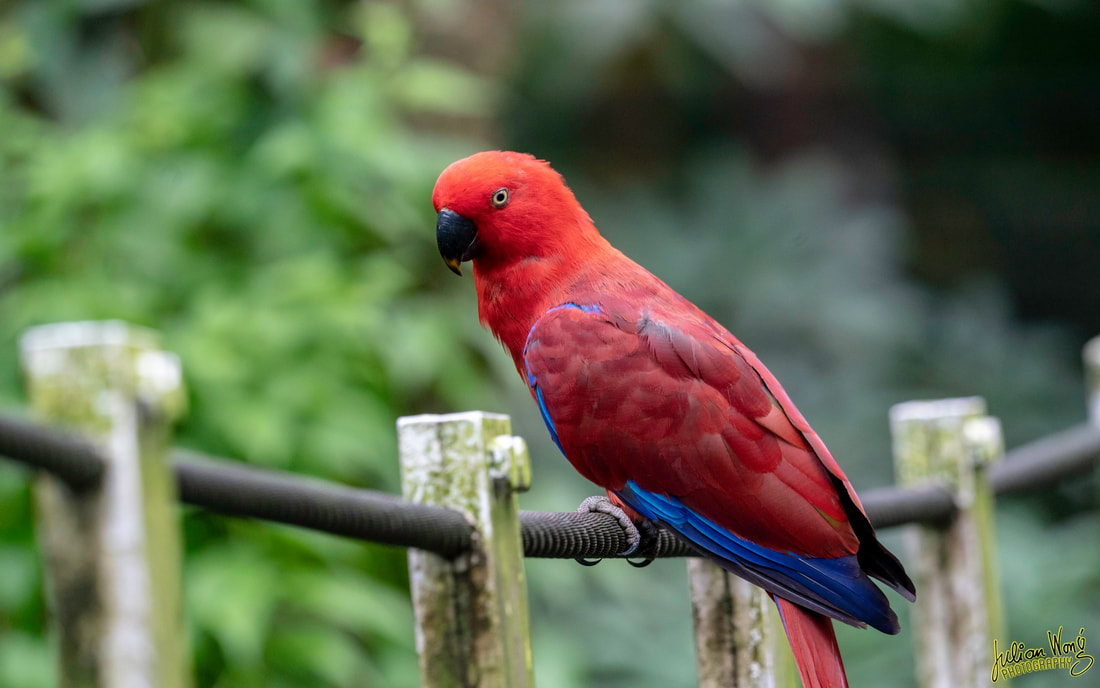
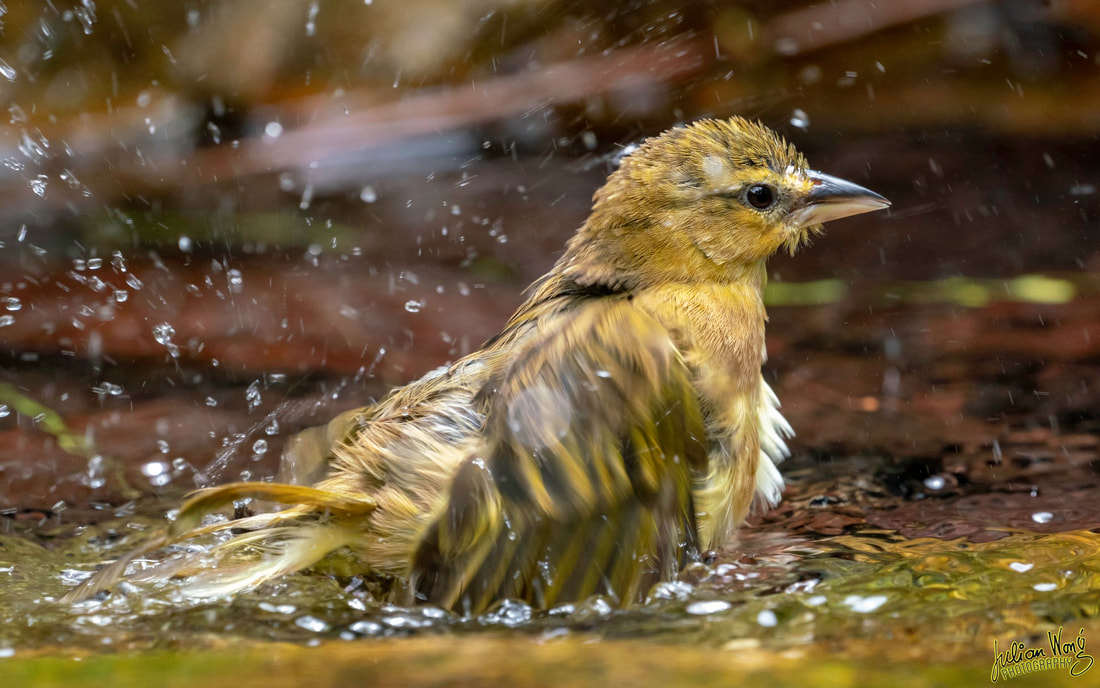
Getting to grips with a new lens is always a painstakingly exciting exercise. Although the learning process is never-ending, it is best if you take it out for a well-planned testing regime and get fully acquainted with it before an important photo session or journey. Here are some tips as to how to get to grips with a long telephoto lens: 1. Take it for a long test drive. You need to get used to the additional weight. So the best way is to take it out for a long test drive. For this, try going to the zoo or bird park. Carry the lens, inside the carrying case as well as holding it and cradling it around the uphill and downhill slopes. This is an excellent way of ascertaining whether you need to go to the gym and build up your stamina before the long photo trip. For this, an excellent suggestion is the Jurong Bird Park. It has enough nooks and crannies, hidden observation towers and aviaries to keep you occupied for hours on end. 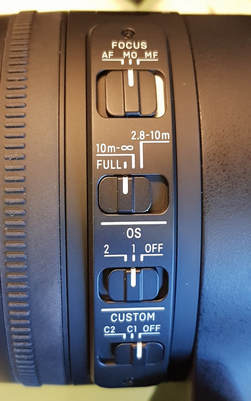 2. Know all the control switches on the lens. When the situation calls for it, you do not have time to second-guess the placements of the control switches and what each setting does. For that I practice with my eyes closed and know the exact locations of the buttons as well as what each setting does. You need to know exactly where to go and which setting to switch to automatically and without having to think. For example, if you need to pan fo follow a moving subject, you need to switch the OS (Optical Stabilizer) to setting 1. 3. Learn to estimate the various focusing distances The minimum focusing distance is one that you need to be estimate quickly else you will find your lens hunting up and down trying to focus on the subject matter. I was testing a Sigma 150-600mm lens and it comes with a middle setting of 10 metres to infinity. So I need to estimate when the subject moves off and is more than 10 metres away. When that happens, you need to then change the auto-focusing setting to the middle or left-most setting. The latter might not be ideal as it will mean that the lens will take longer to hunt the whole focusing range. The shots below were take with the lens fully extended (at 600mm) and at or near the minimum focusing distance. Note the varying image sizes of the heads of birds in relation their overall size. 3. Be aware of the depth-of-field for each telephoto setting. For that, shoot the subject matter with some way of displaying the depth-of-filed. In the example below, I shot the parrot along a rope walk to get a sense of the depth of field for various aperture settings (in this case is F8). The point to note here is that you need use a fast shutter speed and/or secure the lens and camera on a steady tripod so that the results are more accurate. In the example below, even though the head of the bird was sharp, due to the short depth-of-field, the beak was slight off. 3. Test the auto-focusing speed. As I was using an adapter (Sigma MC-11) on my Sony A7RIII for the Sigma 150-600mm lens made for Canon EF mounts, I needed to be doubly sure about the focusing speed vis-a-vis native Sony lenses such as the 24 - 70 GM (which in my opinion is the fastest). For the example below, I chose a fast-moving subject such as the bird taking a bath in the water puddle. Although the focusing was fast enough, it wasn't catching the right subject matter and kept focusing on the droplets instead. 4. Try out the various AF (auto-focusing) modes. With reference to the example above, I then tried using the MO or manual over-ride mode. But alas the bird was way too fast, and for this shot I have to switch to MF manual focussing mode, pre-focus and then pressing the shutter release at the right moment. 5. Understand the characteristics of the lens Try taking shots with dark or black backgrounds and see if there are any uncontrollable chromatic aberrations. Then try a brightly-lit background to test for flare and how the lens handles contrasty situations. If you must, pixel-peep and set the image magnification to 100% or crop accordingly. From there, find the optimal aperture setting of the lens. In the case of the Sigma 150-600mm lens, I find that the optimum setting is F8. The more you get acquainted with your new lens, the more you are able to bring out its full potential, so go out, take as many shots as possible in as many situations as you can find and see how it handles all of them. Happy shooting! There are tons of great must-have features on new Sony A7RIII however, I am sorely missing two of my favourites - panorama mode as well as the time lapse function using the PlayMemories Camera Apps. For the latter I have been able to overcome this omission by using a combination of the three modes as outlined below.
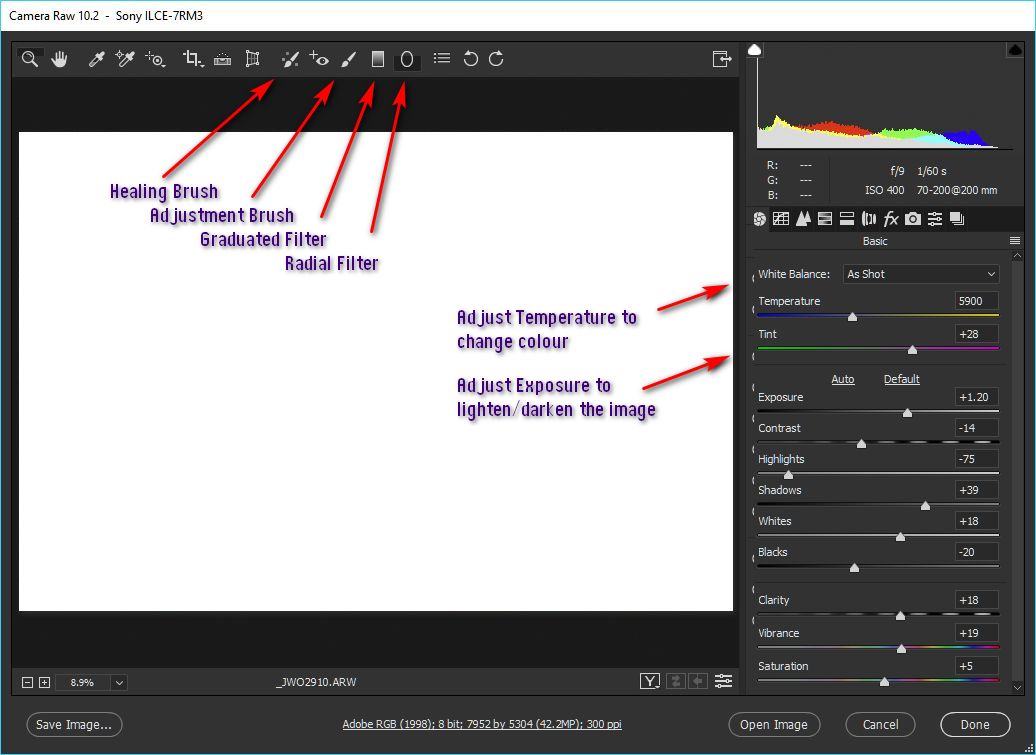
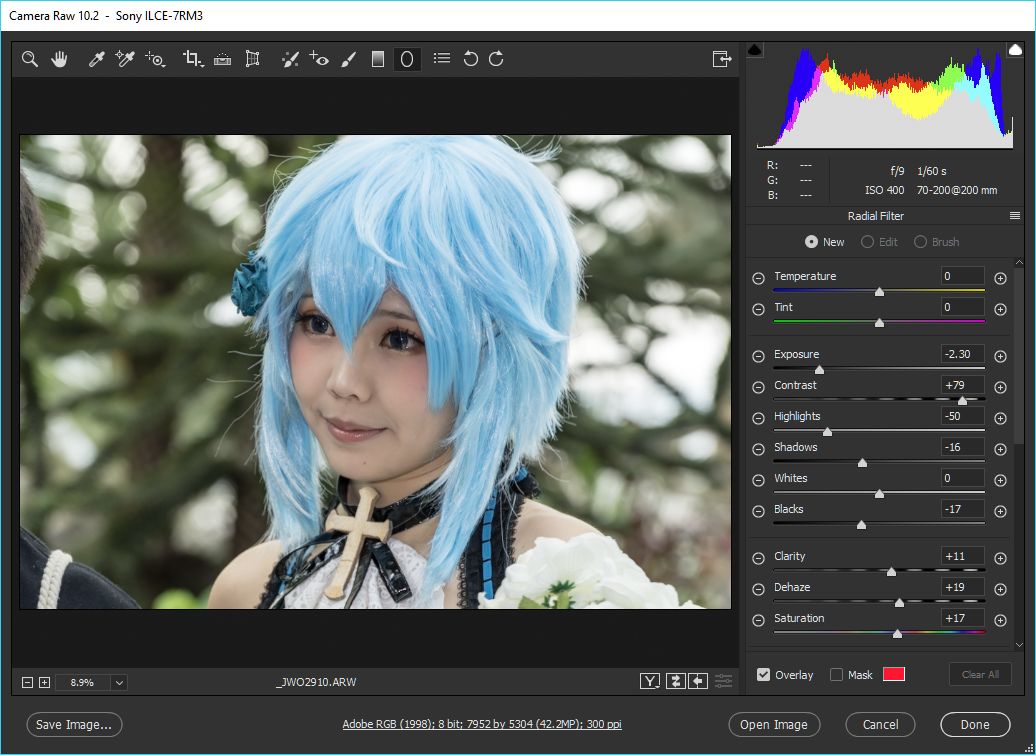
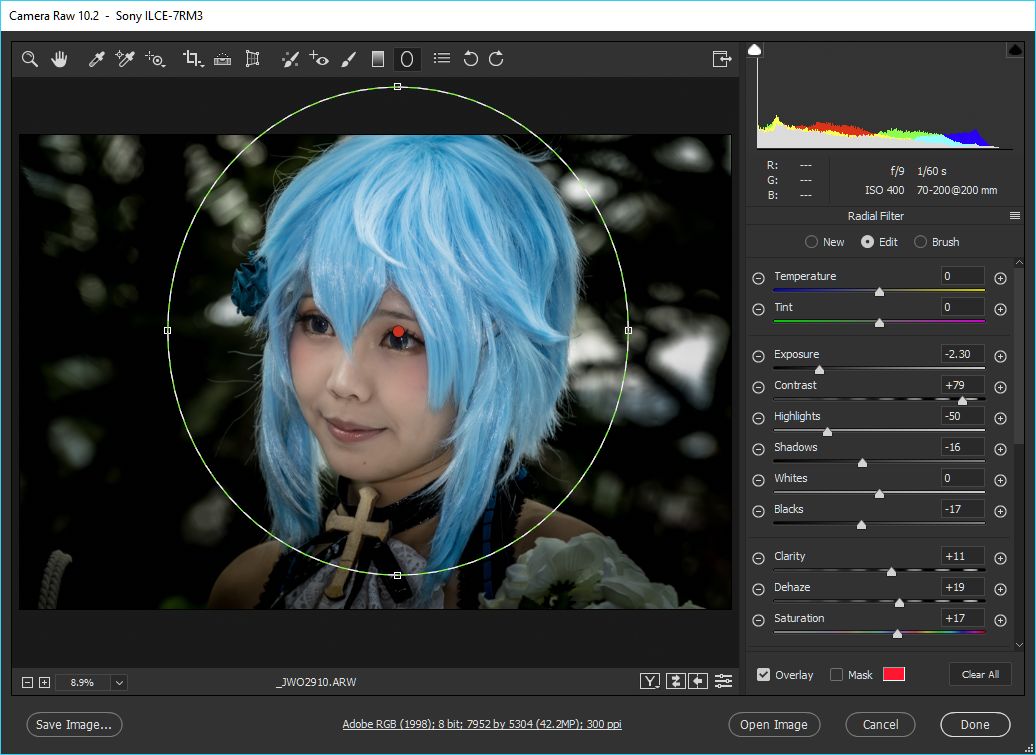
I am a purist in many ways, and have always maintained the fact that there should not be too much post-processing of my photographs. I maintain the rationale that if my pictures show the "wow" effect and if the actual scene is nowhere near as dramatic, then I am shortchanging my audience. My term for it is a "Photoshop Lie". However, coming from the days where my darkroom skills (yes, I did own an enlarger in my younger days) allowed me to do some form of editing, I sometimes allow myself to experiment with some Photoshop techniques that mimick the traditional techniques of dodging and burning-in using pieces of cardboard and a wire. To correct horizontal and verticals, I would tilt the board holding the photographic paper as I exposed it to the light from the enlarger. And that is about the limit that I would allow myself to go when doing post-processing with Adobe Photoshop and using the Camera Raw program. Because of the latitude of raw images from modern digital cameras such as the Sony A7 series, I always shoot in Raw. So for this series of experiments with Adobe Camera Raw, I used a combination of the Radial and/or Graduated Filter as well as the Adjustment Brush and a bit of Spot Healing to bring more attention to the subject matter. I start off by importing the Raw file into Adobe Camera Raw, either from Bridge or by directly opening into Photoshop. An example is this image below. Original file before application of Radial Filter. I then apply the Radial Filter around the head of the model The Radial Filter has the effect of burning in the edges of the picture, thus bringing the focus back to the subject matter. In this case it is for emphasising the sparkle in the eyes of this celebrity Cosplayer. For matching the colour of her hair, I used the Temperature and Tint settings for a more enhanced effect. Some more examples of using the Radial Filter. In most cases, the photo has been shot using a small flashgun (like the Godox TT-350S) as fill-in for the shadows and to provide the catch-light in the eyes of the subjects. If needed, you can use the Adjustment Brush to brighten or darken parts of the image.
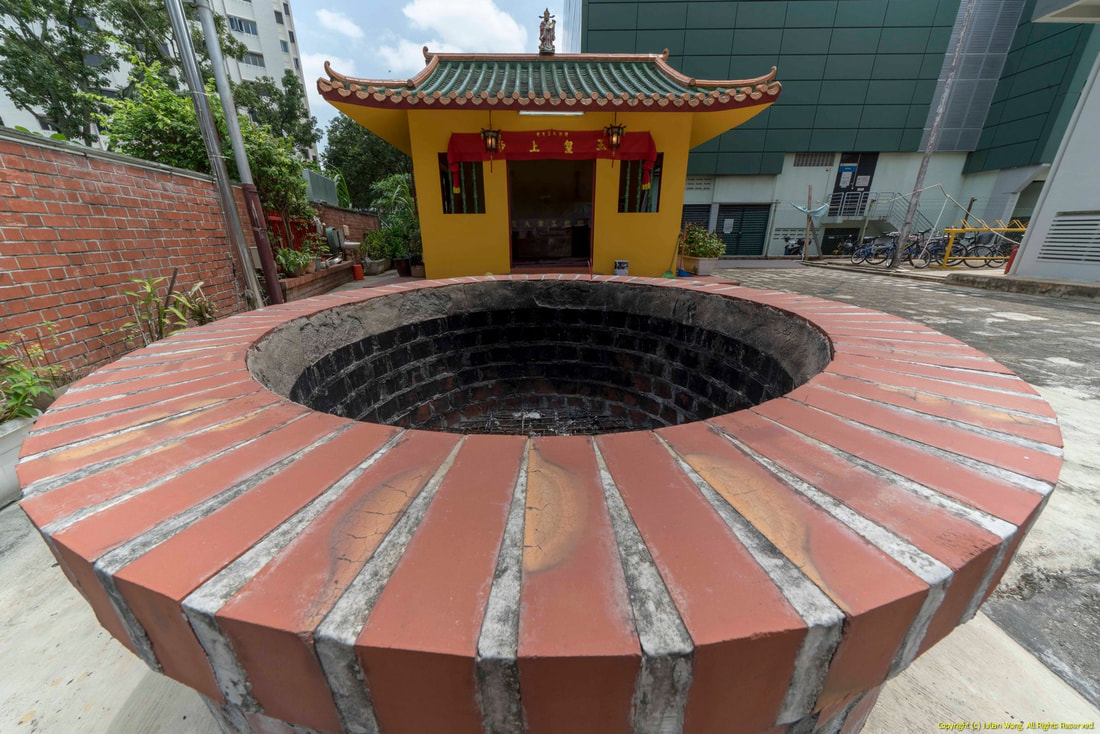
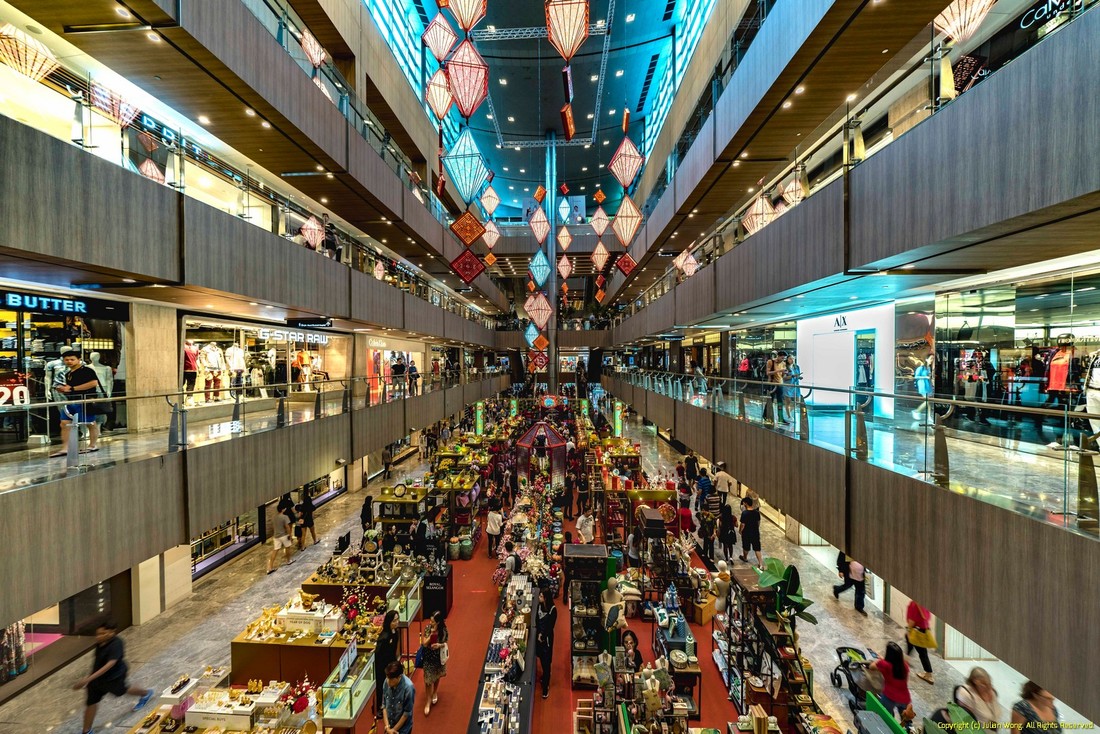
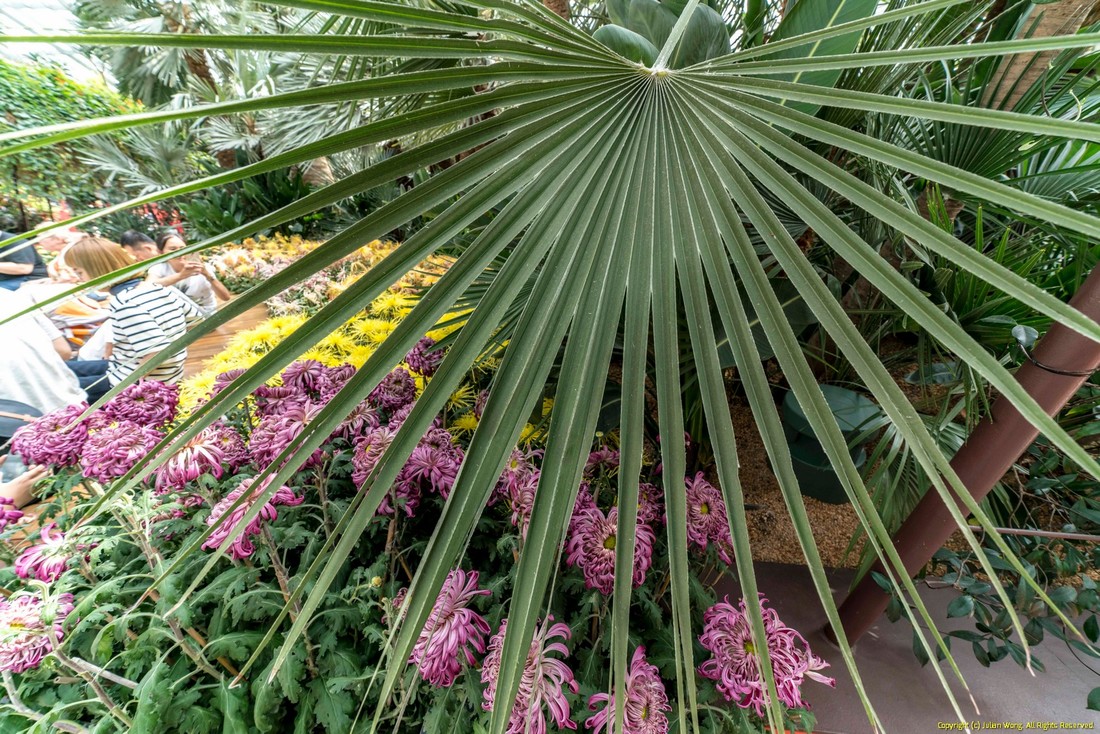
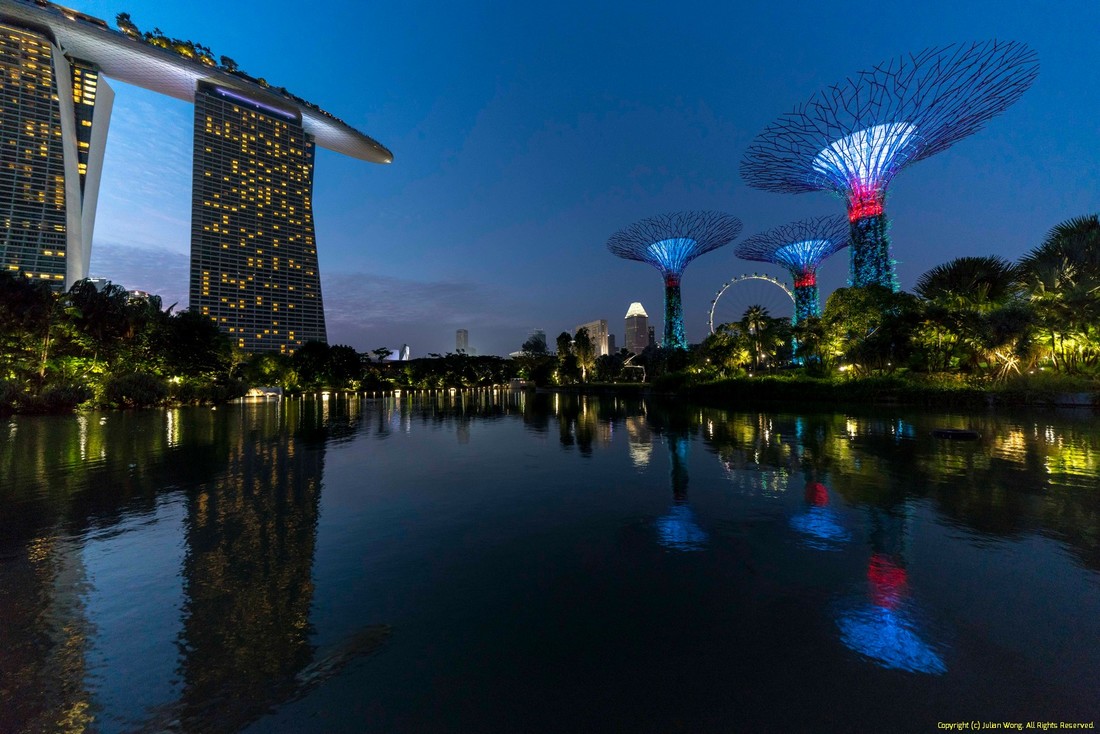
Ever since I switched to the Sony A7 range of mirrorless cameras some four years ago, I have always wanted an ultra wide-angled lens. So when the FE 16-35 F4 Z was released, I immediately got hold of one. However this lens was not wide enough for some shooting situations that I encountered. So when the FE 12-24G was announced, I was elated. This was the ideal lens to complete my "trinity" together with my FE 24-70GM and FE 70-200 G. I put this lens through its paces and here are some of my initial impressions. The coverage of this lens is truly remarkable. It really needs getting used to and I had to fully depend on the viewfinder to compose. Previously, I had used my 16-35 for this extreme shot but was not able to fully cover the whole well in the foreground. With the 12-24 it was a breeze. Next was the perspective shots and again the 12-24 was up to the task. Even in extremely cramped situations, the 12-24 got me out of trouble. For close-up shots, I found that setting the lens to 24mm and shooting at its minimum focusing distance of 0.92m produced smooth and pleasant bokehs! Even in the most awkward of lighting conditions, the 12-24 was able to faithfully reproduce the colours in spectacular fashion. The sharpness of the lens was beyond my wildest dreams! In extreme lighting conditions, there was little or no lens flare and chromatic aberration was not noticeable in all my night shots. This is truly a remarkable lens, and one that I have fully fallen in love with. I will definitely take it along with me in all my field trips.
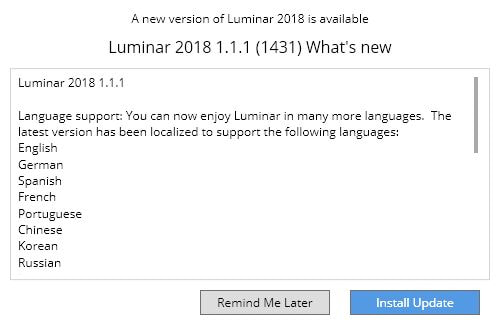
Good news for all Luminar 2018 users! The latest January update is here. Best of all it is free. Just start up your Luminar 2018 software and you will be greeted with the following message:
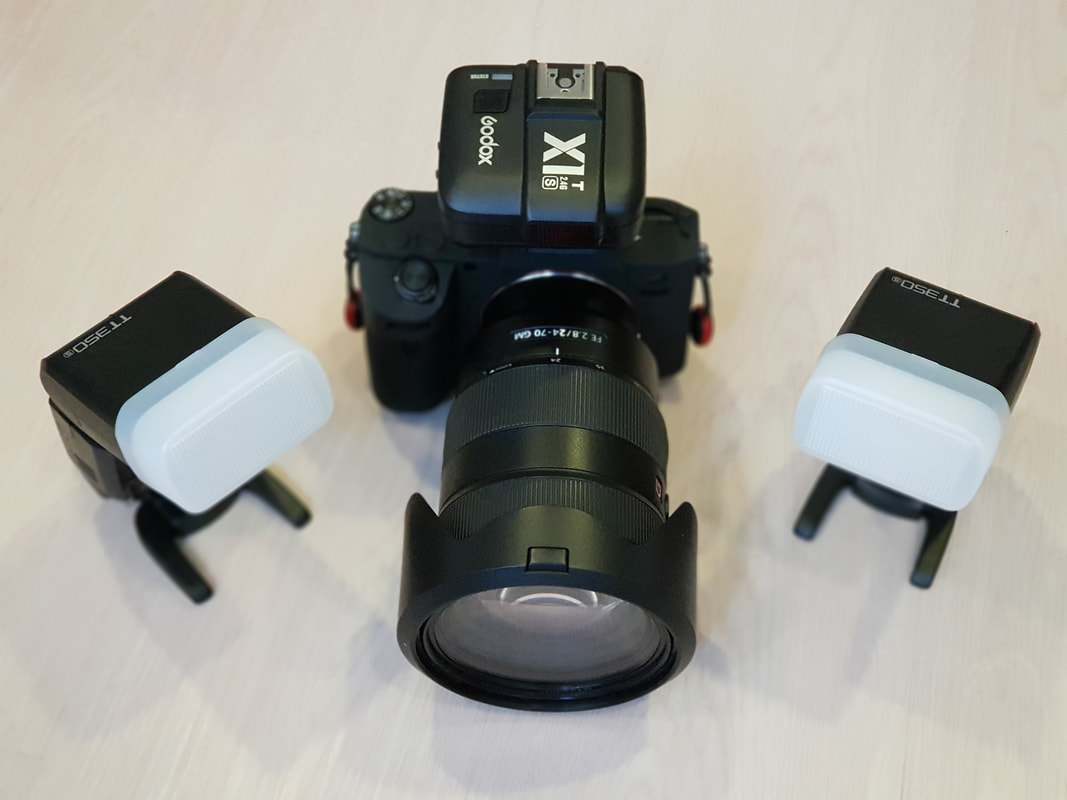
If you are in the market for a small flashgun to complement your Sony mirrorless camera, look no further than the Godox TT350S. At 200g it makes lugging around the flashgun for my Cosplay shots more comfortable and less imposing. I find the guide number of 36 (m, ISO 100 @105mm) great as a fill-in synchro-sunlight flash. Capable of HSS (high-speed sync) at the press of a button, it is just ideal for off-flash photography when synchronised with the Godox X1T-S 2.4G Wireless TTL Flash Transmitter. In fact the TTL350S worked so well with the transmitter, I got myself a second unit! Even as a stand-alone flash hooked to my Sony A7RIII, it worked like clockwork - accurate TTL (through the lens) metering, HSS and manual settings with recycling times around 1-2 seconds.
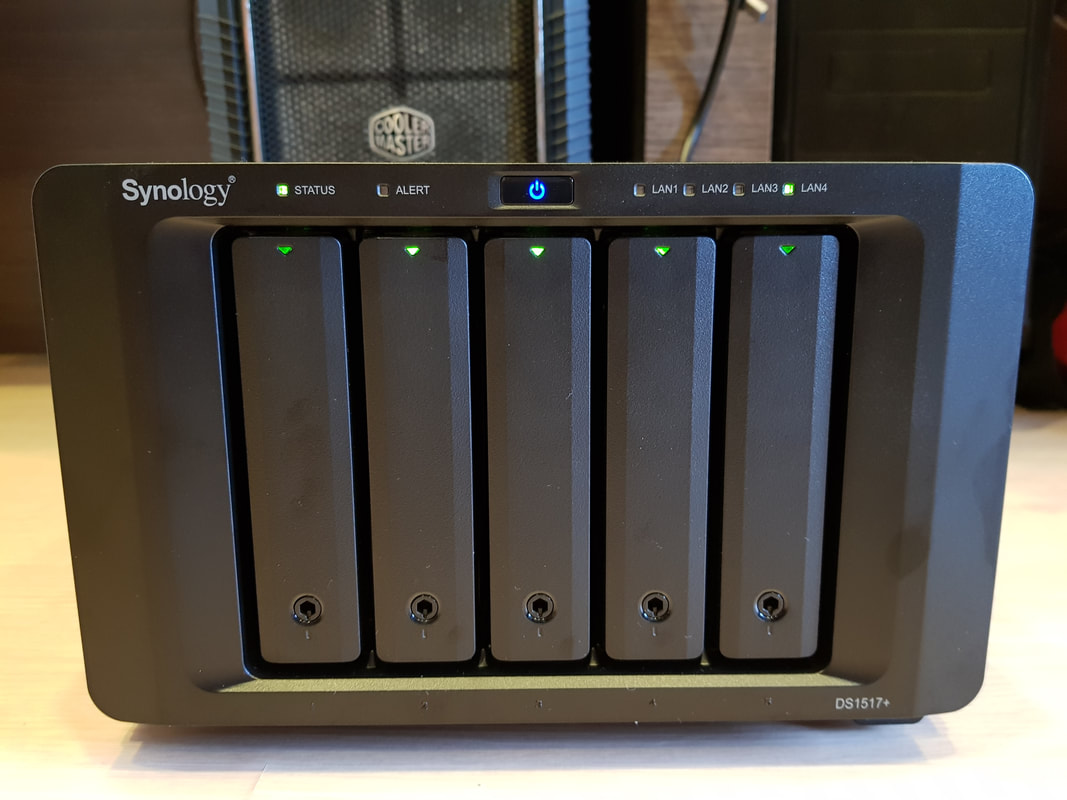
Together with my 24-70GM lens, the coverage of the TT350S is just perfect - from 24mm to 105mm. One fresh pair of 2500mAH Nickel-Metal Hydride batteries lasts around 200 shots. To cut the matter short, I want a way of ensuring that all the memorable moments captured in photos and videos last as long as possible. In my mind I have settled the issue with the use of a NAS or Network Attached Storage formatted with RAID 5 for redunancy in case one or more drives fail. The problem was that my old Buffalo 5TB NAS is over 90% full and so I went in search for another. Looking back to the time when I first acquired the Buffalo NAS over 7 years ago, I would not have anticipated my acquisition of the Sony 42MP A7RII and subsequently the A7RIII, shooting in RAW and JPEG formats. So I was off in search for a new NAS and settled for the Synology 1517+ fully loaded with 6TB HGST RAID 3.5" disk drives and formatted with RAID 5 to give me a usable storage capacity of around 20TB. I reckon that should keep me happy for another decade or so. So what made me decide on the Synology 1517+? Well, a few factors, and just to list them:
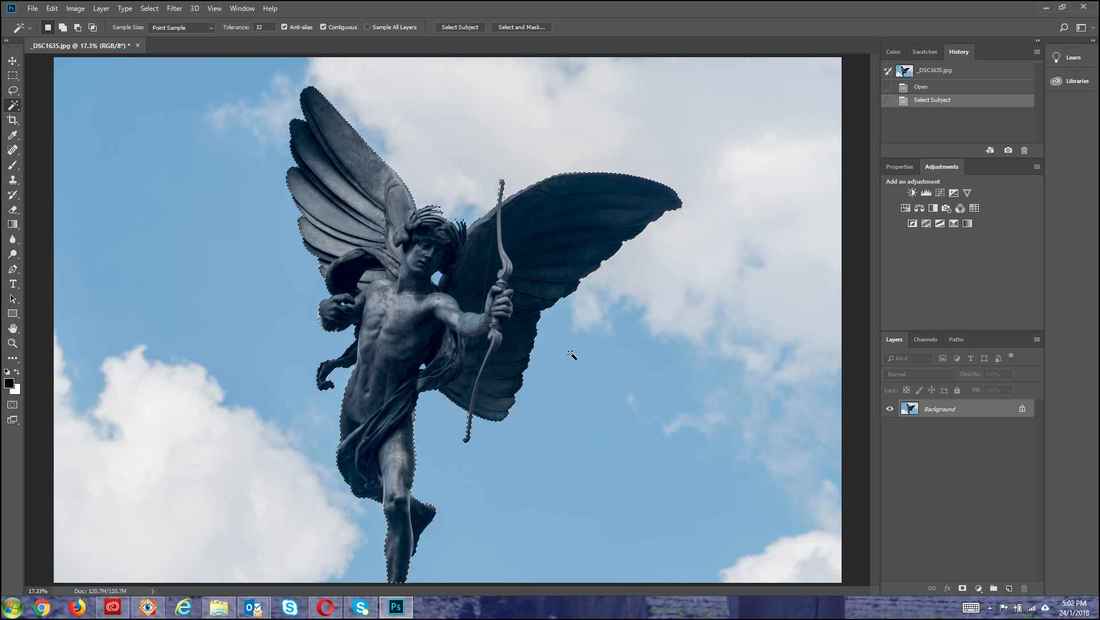
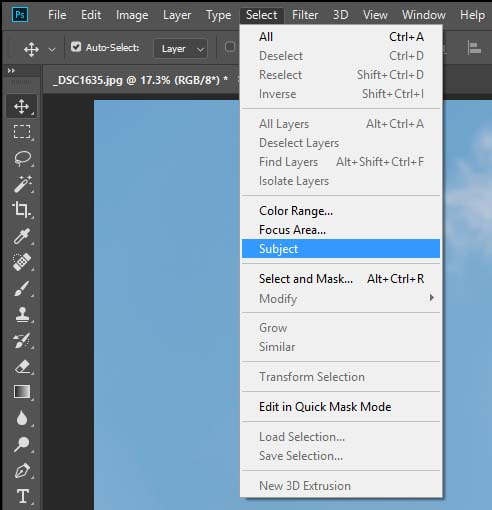
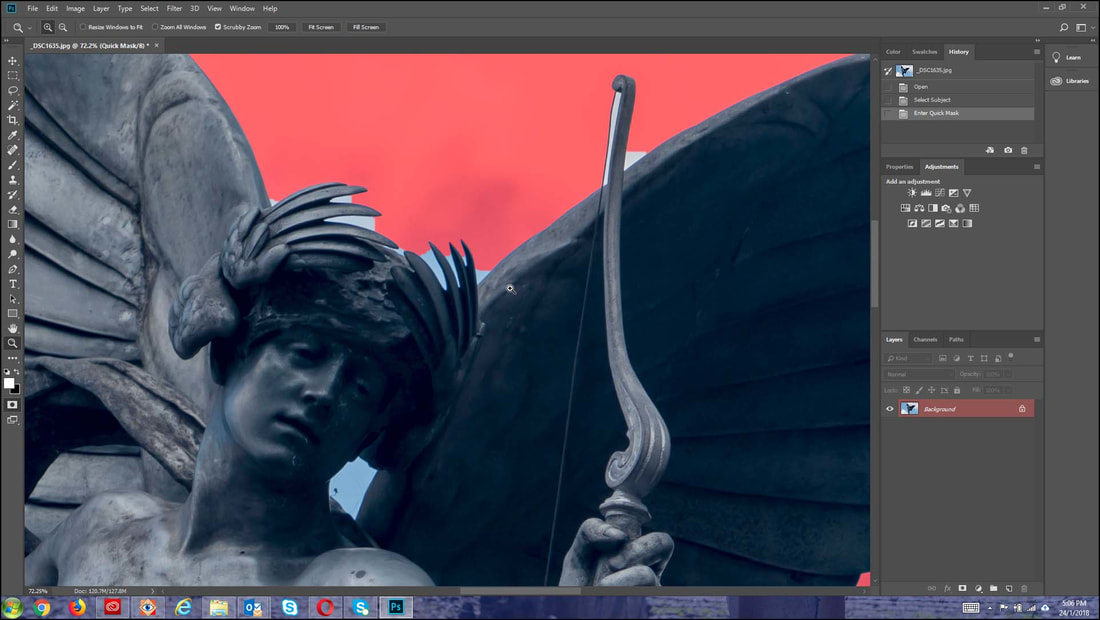
I was pleasantly surprised to see that there is a new update for Photoshop CC2018 that arrived yesterday. One of the most exciting features in this new version is the Select Subject function. Initial experimentations show that it is usable but not perfect. First-off was a photo of the Eros Statue, a relative easy task to cut off the sky and clouds in the background. There are several ways of invoking this new function. The simplest is to just click on the Select and then scroll down to the Subject function. Another way which I found more useful is to from the Magic Wand, and clicking on the new Select Subject button from the top menu. The results are not perfect. As can be seen on closer scrutiny, the top crown of feathers of the statue was not properly selected. So was the sky between the strings and the bow and the gap between the head and the wings.
Nevertheless it was impressive indeed and those small imperfections are easy to correct with quick click of the Magic Wand function. |
AuthorAn avid photographer since when he was a kid, M.K. Wong delves in both photo-taking as well as post-processing techniques. Archives
March 2021
Categories |
Proudly powered by Weebly



















 RSS Feed