
|
The new beta version 24.6 of Adobe Photoshop has just been released. I was curious as to how the new Generative Fill function using AI would work in the context of all the pictures pertaining to bird photography that I have been busy with the past few years. As I find out more about this incredible feature, here are just four ways in which I was able to apply the Generative Fill function in my area of bird photography. Experimentation 1: Removal of unwanted items. First off, in the course of taking pictures of birds out in the wild, there is just no way that you can avoid unwanted branches or leaves ending up as part of the background. Here is one example - the Blue-eared Kingfisher appeared out of the blue and with hardly enough time to adjust and move to a better location, I started shooting. No soon had I taken about a dozen shots, the bird flew off, never to return the rest of the morning while I was there. 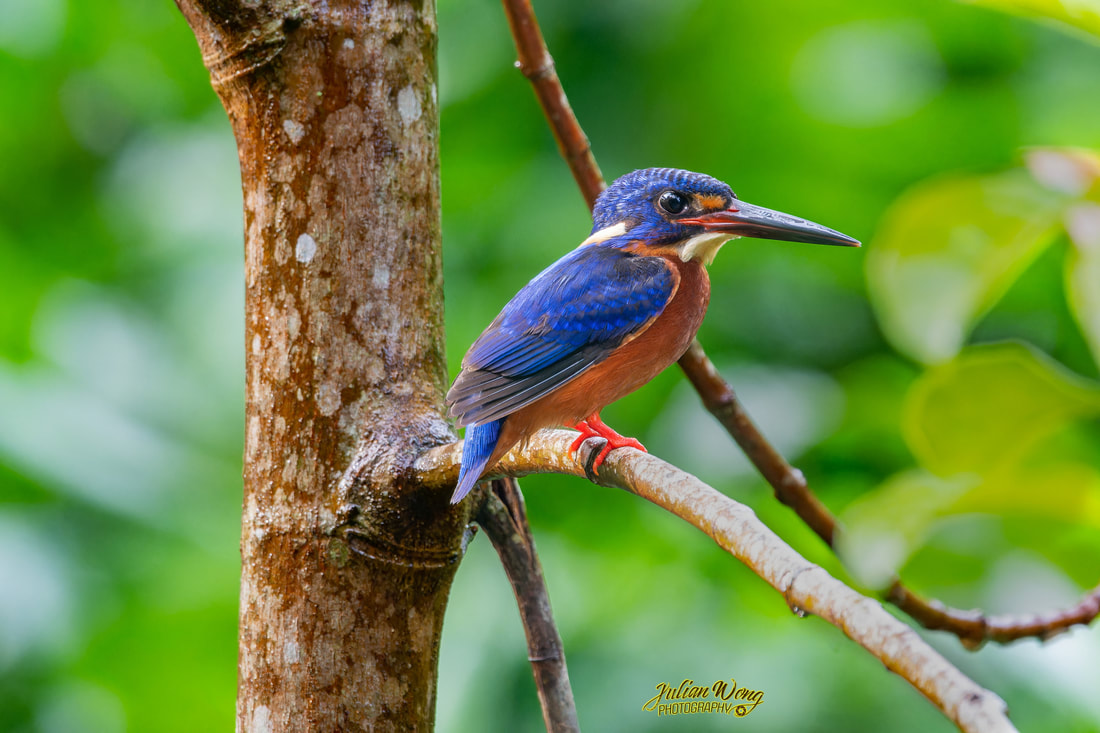 Full frame uncropped photo of the Blue-eared kingfisher Despite many other attempts at the same location, the bird seemed to have disappeared from this its favourite perching branch. So it left me no choice but to put the new Adobe Generative Fill function to the test. And with just a few movements of the mouse to select the ugly unwanted branch at the background here is the result! I was really impressed as it would have taken me a lot of time and effort to get the same result, even with the new Remove Tool (newly added in the Adobe Photoshop version 24.5). 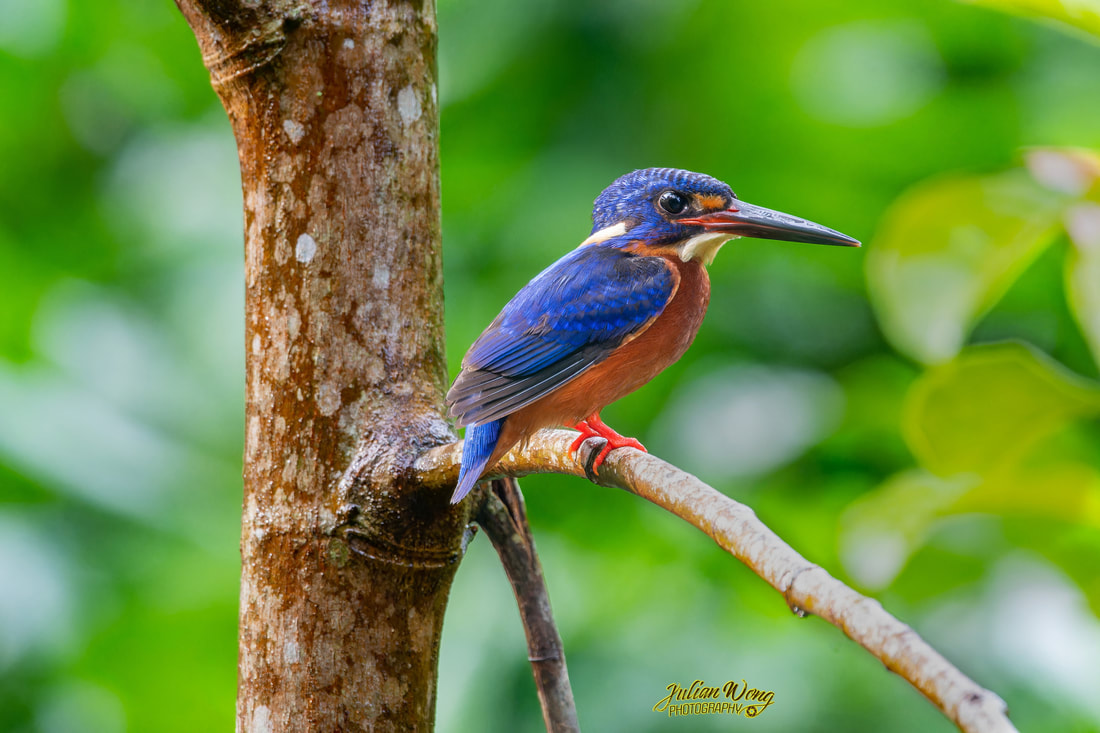 Branch removed using Generative Fill Experimentation 2: Extension of cut-off images The next experimentation I tried was to extend parts of images that I shot that were inadvertently cut off due to my bad framing. Of course I could have easily gone back and reshoot if I wanted to - as was the case of this Blue-winged Kookaburra at the newly opened Bird Paradise at the Mandai Nature Reserve. But just for fun, I decided to try this seemingly simple exercise. 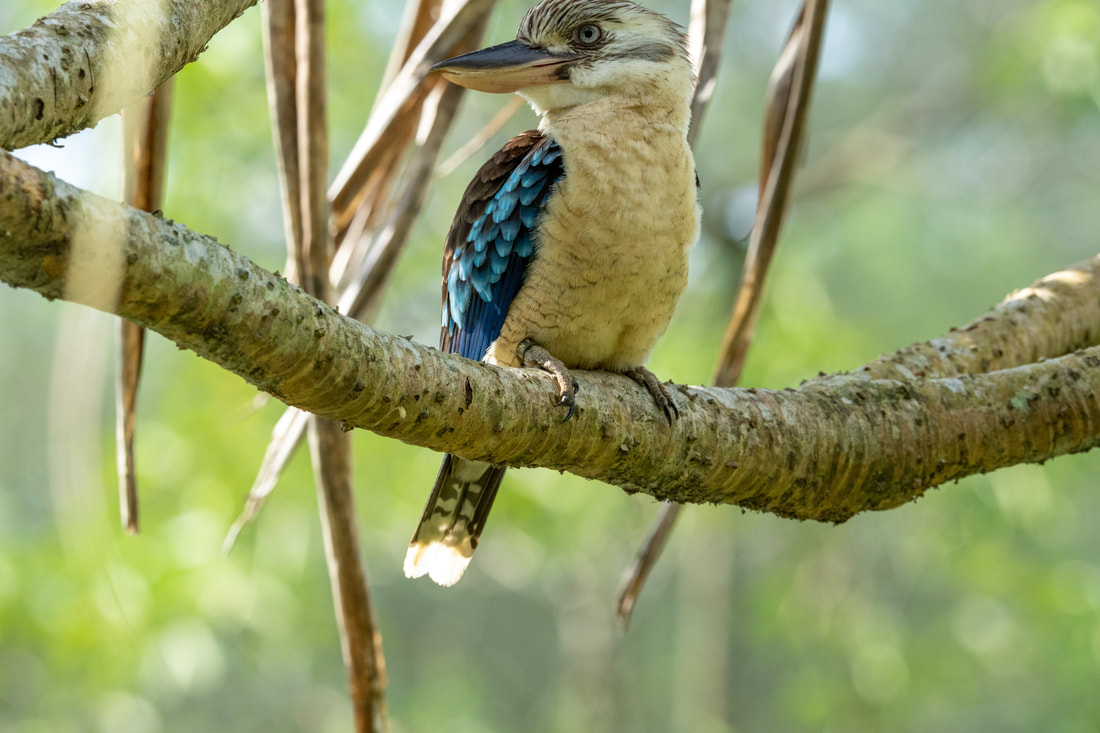 Full-frame uncropped photo of the Blue-winged Kookaburra At first I thought it was a trivial exercise but when I went about trying to do it manually, I gave up because of the many branches and leaves in the background. Added to this was the slightly cut-off head of the bird and that took up quite a lot of effort of trial-and-error. So when I tried the new Generative Fill, I was simply amazed by the results. By expanding the canvas and then selecting the additional area, I was able to fully able to restore the photo with just a few button presses. I was (and still am) lost for words! Not only was it able to generate three variations, it was able to generate three versions of the complicated background of leaves and branches! And the original image was a 50MP file from the Sony A1!!! Here is the result: 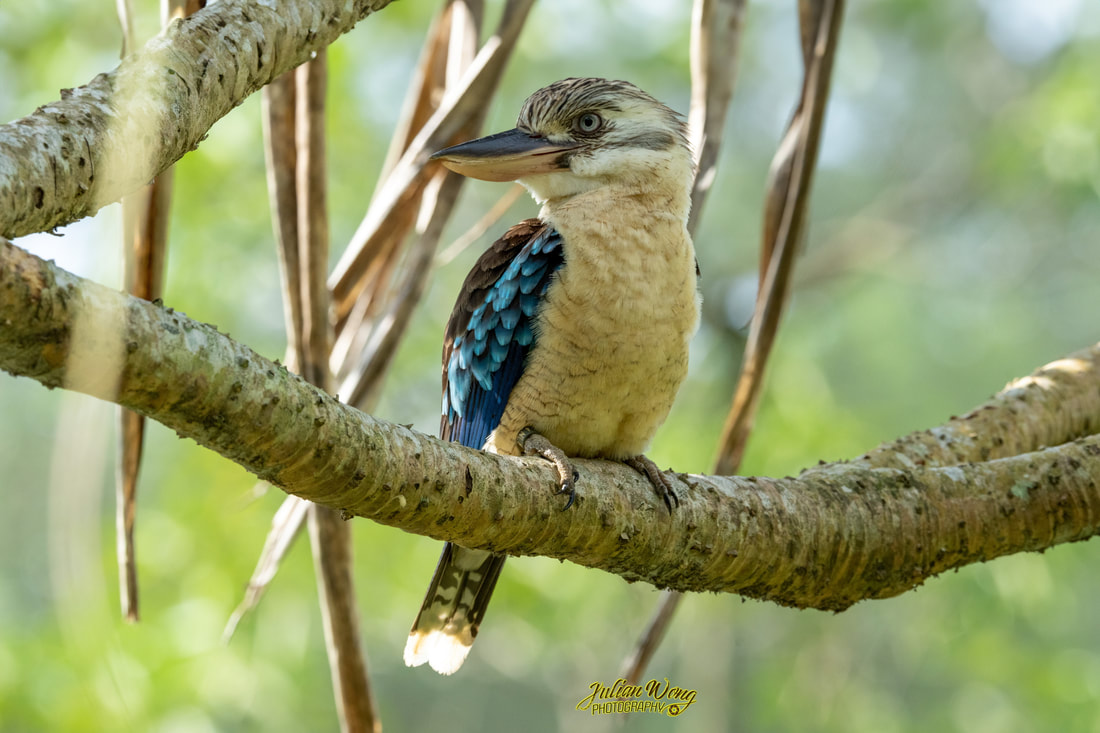 Cropped image of the resultant Generative Fill image to maintain 2:3 as aspect ratio If I had shown you the picture above without first showing the original cut-off image, I bet you would not have known that it was a generated image! It was even able to extend the blur leaf on the top left! This is simply astounding! Experimentation 3: Generation of backgrounds From here, things have just taken a quantum leap! Using Generative AI, I was able to write in plain English what I want to have as a background and the software will do the rest. Over the weekend I was alerted to the presence of the Black-winged kite over at the Gardens by the Bay, and when if finally flew in with its breakfast of a fat rat, it landed on a nearby lamp post. With that as the starting point I decided to remove the boring overcast sky (it has just stopped raining). 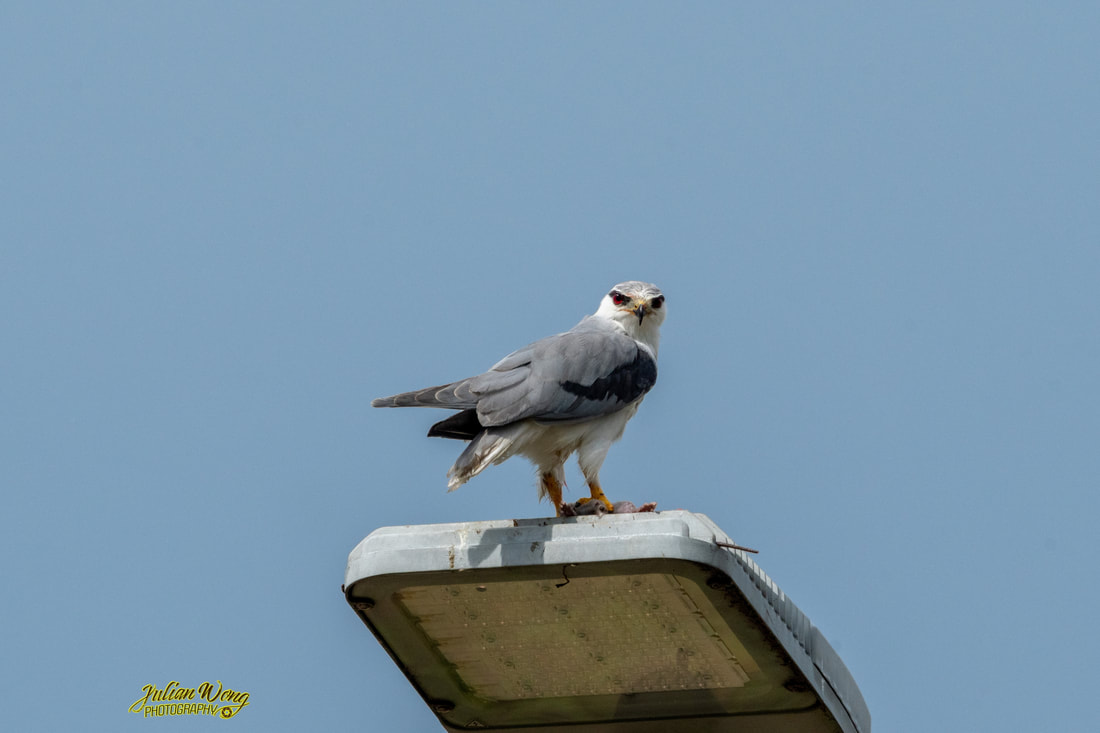 Uncropped image of the Black-winged kite perched on top of a lamp post Here are a few variations of backgrounds using the new Generative Fill function. First using the new Contextual Task Bar, I selected the subject (the bird), then clicked on the Inverse icon on the right, to select the sky. I then clicked on the Generative Fill button, typed in what I wanted to see, e.g. "nest at the edge of a cliff in a thunderstorm" and viola! Photoshopping will never be the same ever again! Here are some examples of the nest in a thunderstorm and lightning storm!  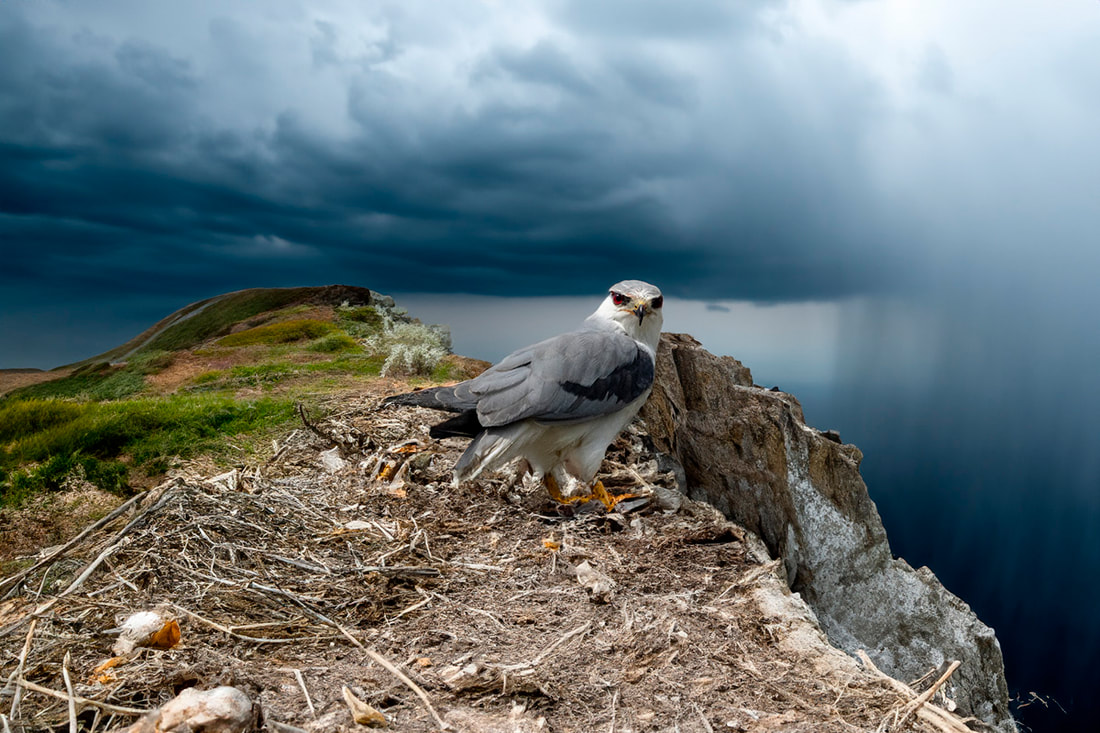 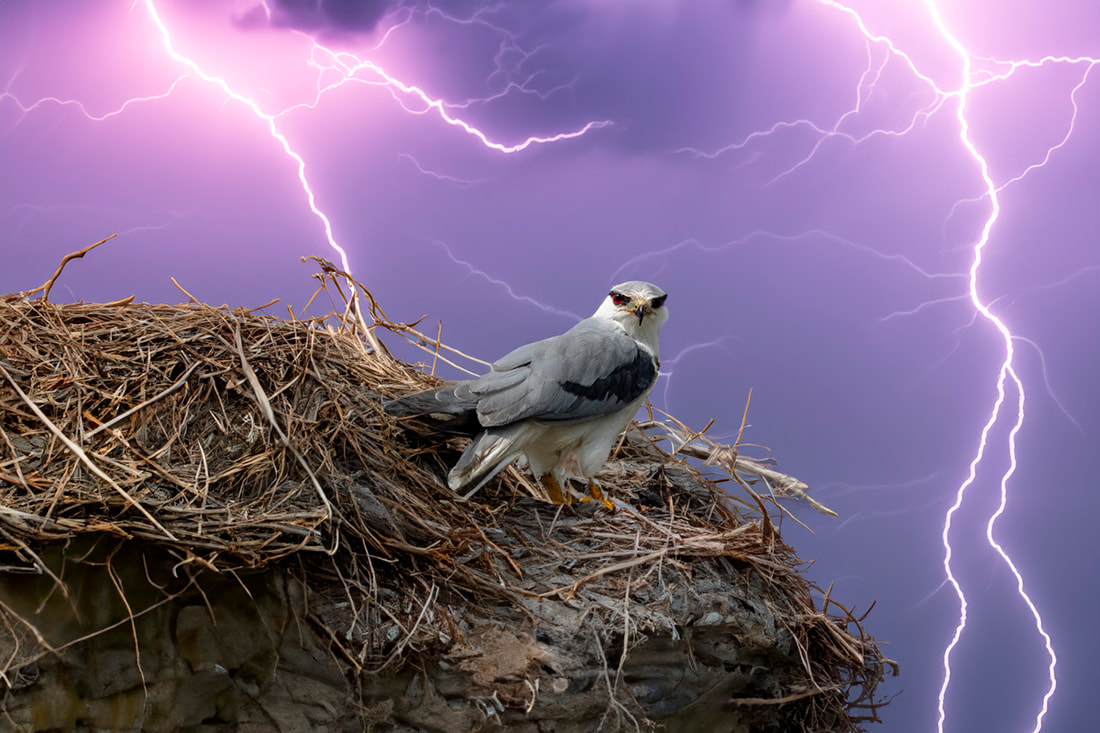 Experimentation 4: Adding a generated image So this is just an extension of the experimentation above and instead of the background, I instructed the Adobe Photoshop software to generate an image. To start off, I used an old image of the cherry blossoms I shot at the Flower Dome some eons ago. 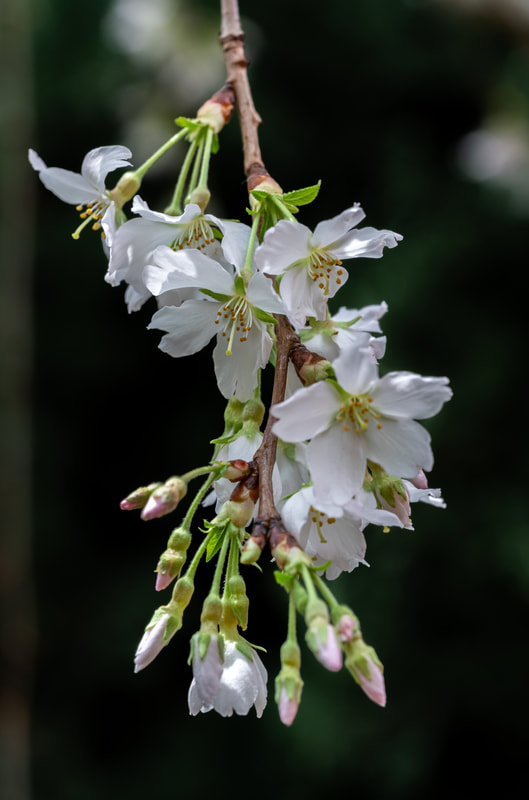 Photo of a cherry blossom bloom taken at the Flower Dome Noting that the Generative Fill function was only able to generate images around 1024x1024 pixels (for the moment - Adobe has informed us that they will increase the resolution on subsequent updates), I downsized my image accordingly. Then using the Crop Tool, I dragged the canvas to about double the original width towards the right. After selecting the extended portion I simply hit the Generative Fill button, typed in what I wanted, for example "hovering hummingbird feeding on flowers" and again the software did the rest! 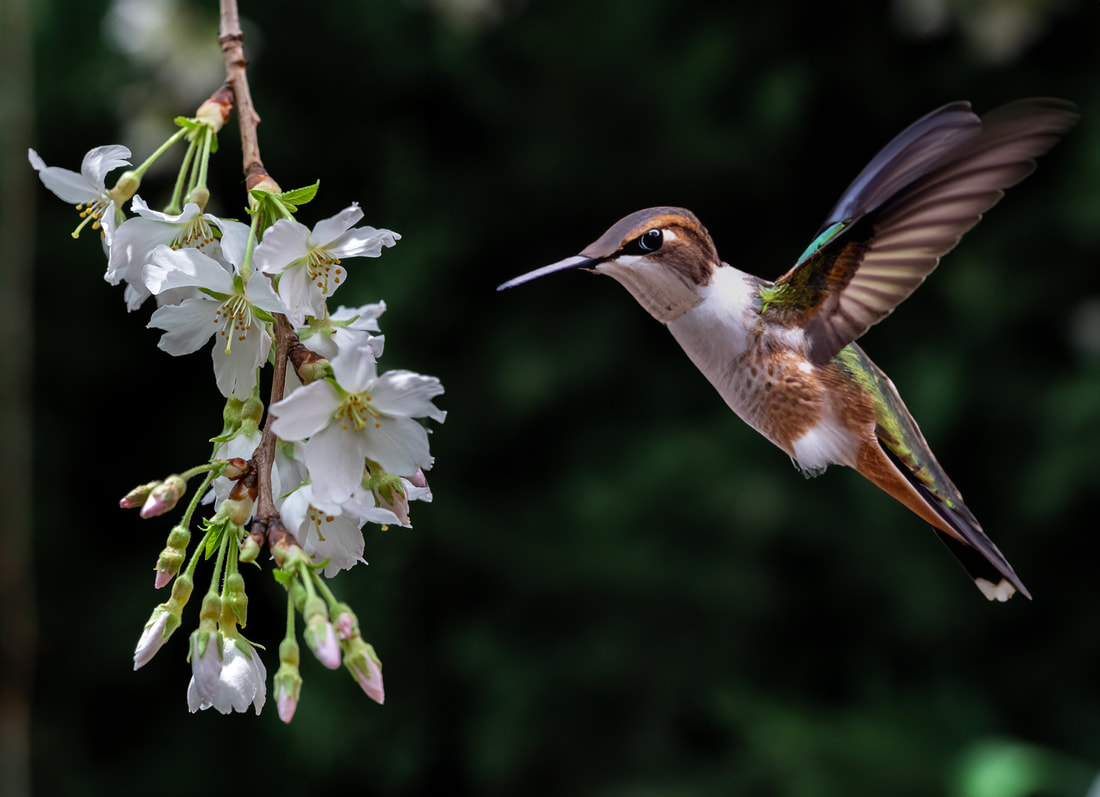 Generated image of the hummingbird inserted onto the image of the cherry blossoms So what do you all think of the new Adobe Photoshop Generative Fill function. Leave me a note in the Comments section. I would sure love to hear from you!
1 Comment
Morgan
24/5/2023 07:56:27 pm
Interesting read, thanks for sharing! Leave a Reply. |
AuthorAn avid photographer since when he was a kid, M.K. Wong delves in both photo-taking as well as post-processing techniques. Archives
March 2021
Categories |
 RSS Feed