
|
I am a purist in many ways, and have always maintained the fact that there should not be too much post-processing of my photographs. I maintain the rationale that if my pictures show the "wow" effect and if the actual scene is nowhere near as dramatic, then I am shortchanging my audience. My term for it is a "Photoshop Lie". However, coming from the days where my darkroom skills (yes, I did own an enlarger in my younger days) allowed me to do some form of editing, I sometimes allow myself to experiment with some Photoshop techniques that mimick the traditional techniques of dodging and burning-in using pieces of cardboard and a wire. To correct horizontal and verticals, I would tilt the board holding the photographic paper as I exposed it to the light from the enlarger. And that is about the limit that I would allow myself to go when doing post-processing with Adobe Photoshop and using the Camera Raw program. Because of the latitude of raw images from modern digital cameras such as the Sony A7 series, I always shoot in Raw. So for this series of experiments with Adobe Camera Raw, I used a combination of the Radial and/or Graduated Filter as well as the Adjustment Brush and a bit of Spot Healing to bring more attention to the subject matter. 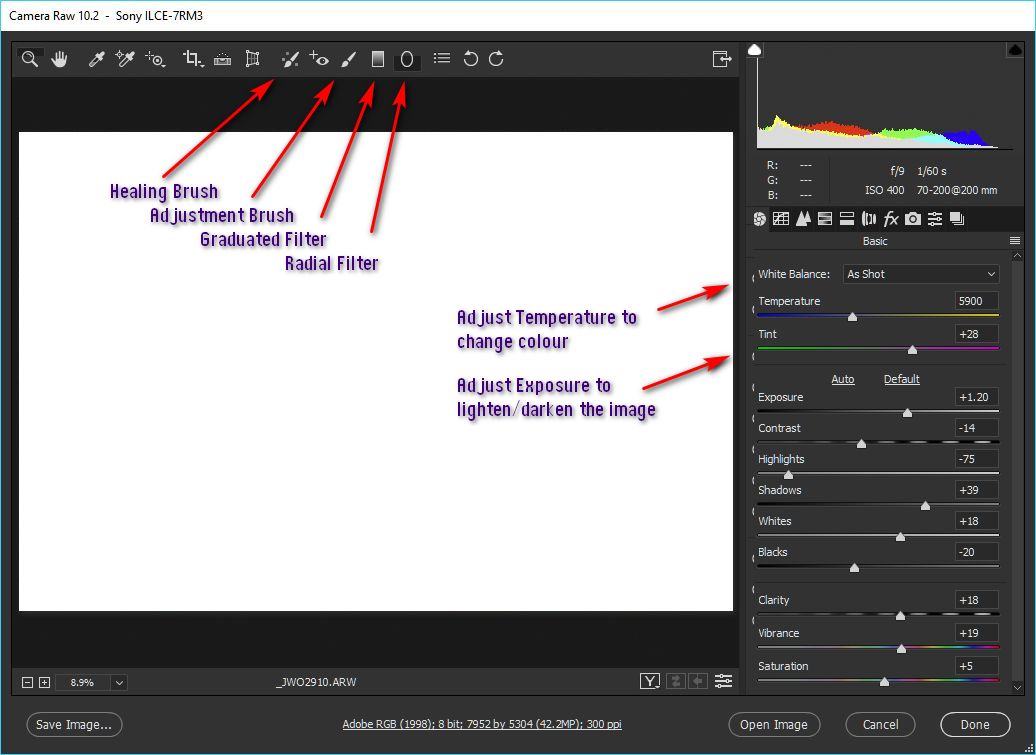 I start off by importing the Raw file into Adobe Camera Raw, either from Bridge or by directly opening into Photoshop. An example is this image below. 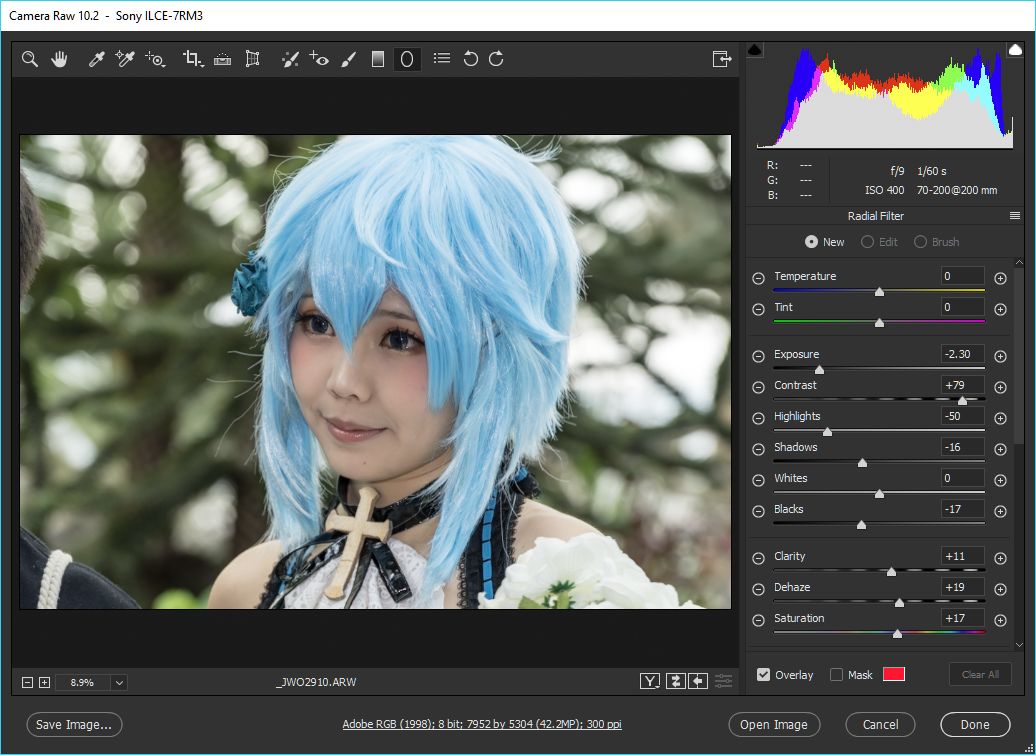 Original file before application of Radial Filter. I then apply the Radial Filter around the head of the model 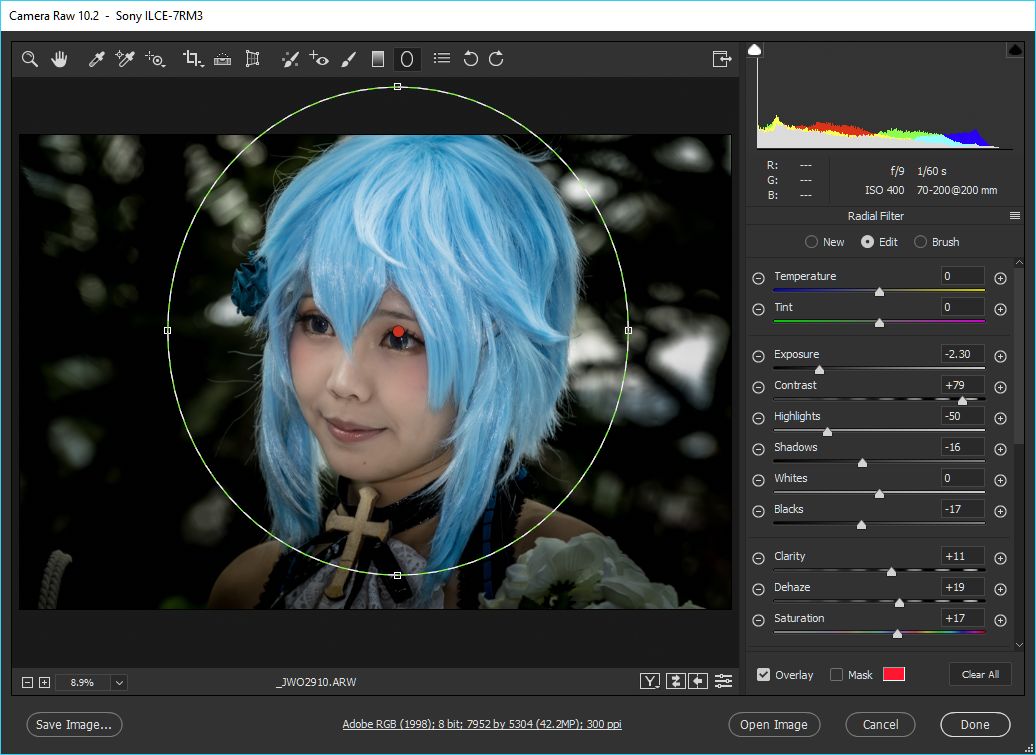 The Radial Filter has the effect of burning in the edges of the picture, thus bringing the focus back to the subject matter. In this case it is for emphasising the sparkle in the eyes of this celebrity Cosplayer. For matching the colour of her hair, I used the Temperature and Tint settings for a more enhanced effect. 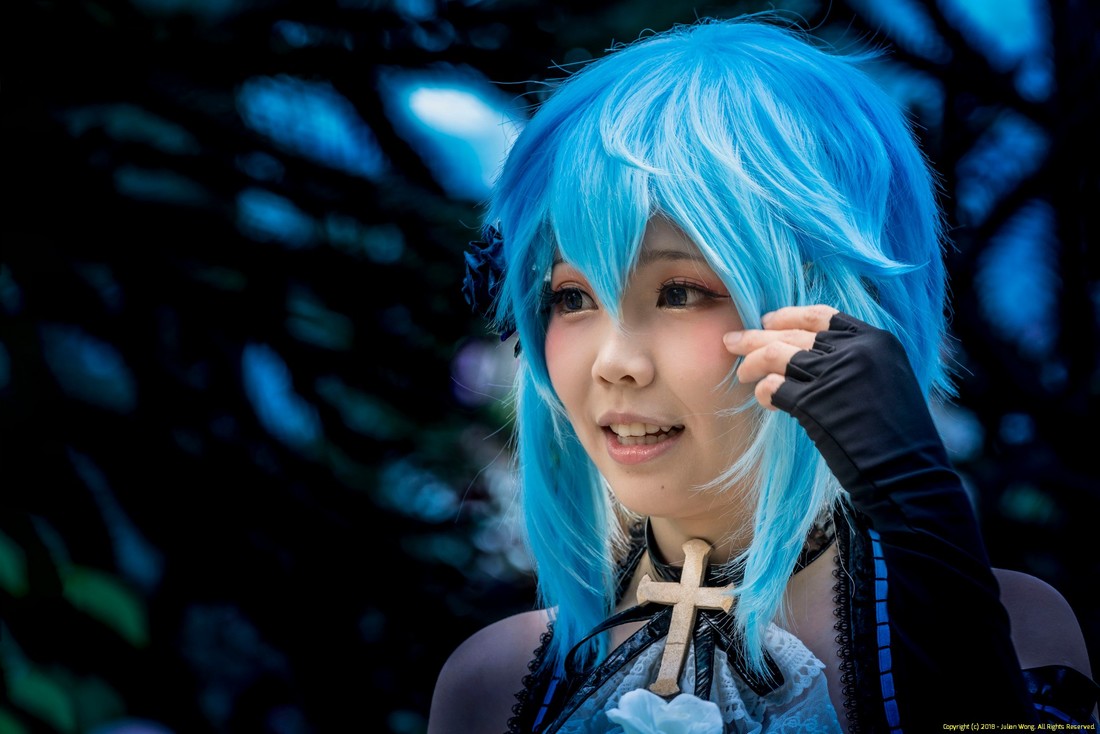 Some more examples of using the Radial Filter. In most cases, the photo has been shot using a small flashgun (like the Godox TT-350S) as fill-in for the shadows and to provide the catch-light in the eyes of the subjects.  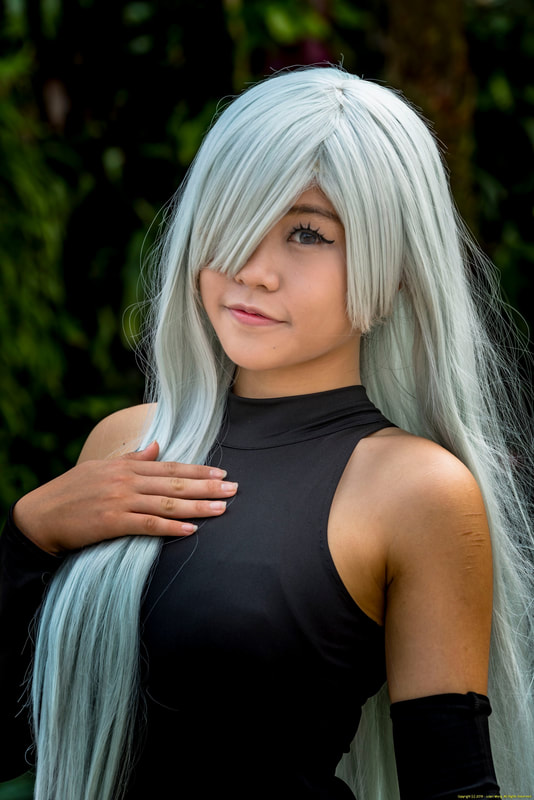 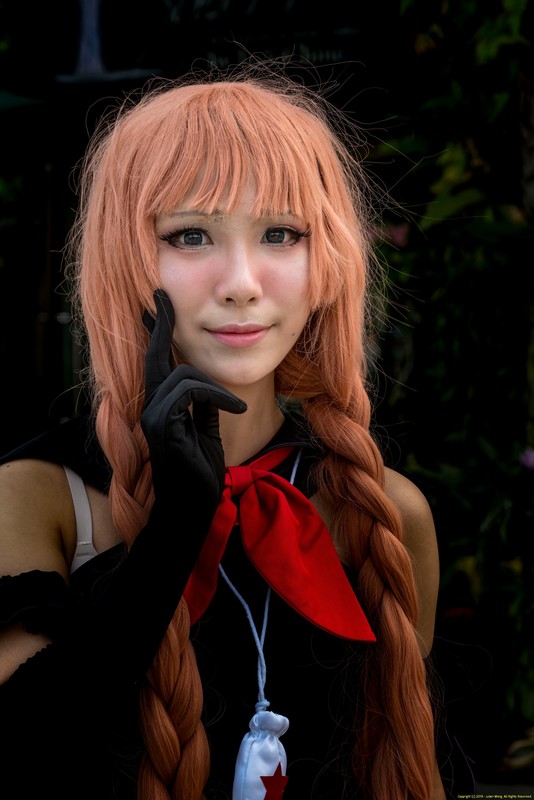 If needed, you can use the Adjustment Brush to brighten or darken parts of the image.
0 Comments
Leave a Reply. |
AuthorAn avid photographer since when he was a kid, M.K. Wong delves in both photo-taking as well as post-processing techniques. Archives
March 2021
Categories |
 RSS Feed